1. Monitoring program
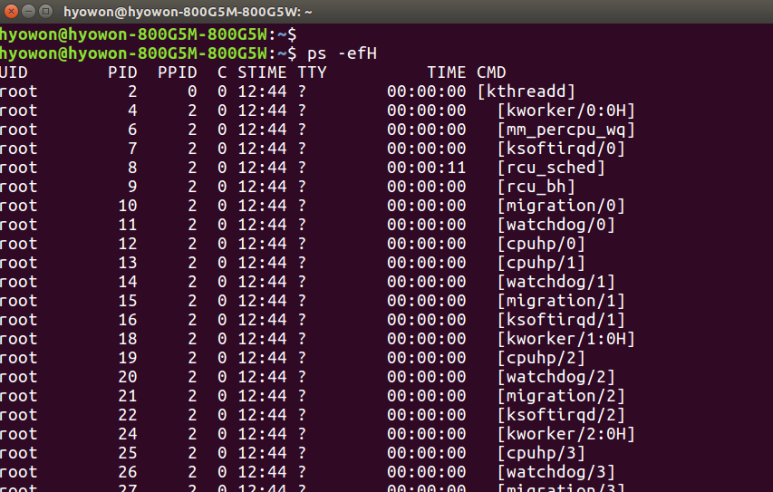
Programs running in Linux are treated as processes. The command to check these processes is the ps command.

The PID tells the process ID number, and you can find out from which terminal the process was run through TTY information. And TIME indicates the time the process uses the CPU and you can check which process (instruction) was executed through CMD. For ps, you can get more detailed information through the option parameter, and the most commonly used option is ef.

A few more fields are displayed differently than when simply executing ps earlier. UID shows the information of the user who started the process, and PPID shows the ID of the parent process of the process. The C field indicates whether the process is using CPU or not, and the STIME indicates the system time when the process was started. The table below shows the use of the option values of ps, and how to use the option is to add a dash after a single dash, like ps -ef, to successive use.

If you want more detailed information, you can get more detailed information by using the -l option

The first field, F field, is a value automatically assigned by the Linux kernel, and the second field s is Shows the state of the process (o=running, s=sleeping state, R=process running state, Z=zombie state, if the process is dead but the parent process is alive, T=process terminated state ) PRI tells the execution priority of the process, NI is used as a value to determine the priority, ADDR tells the address of the memory where the process is located, and sz indicates the maximum memory size that the process will use. give. A useful option among the ps options is the H option, which shows the relationship between the parent process and the child process.
The ps command shows the status of the process at that time when the command is executed. Therefore, if you want to monitor the usage status of processes in real time, you need to use the ps versus top command. The screen below shows the status of the process in real time after executing the top command.
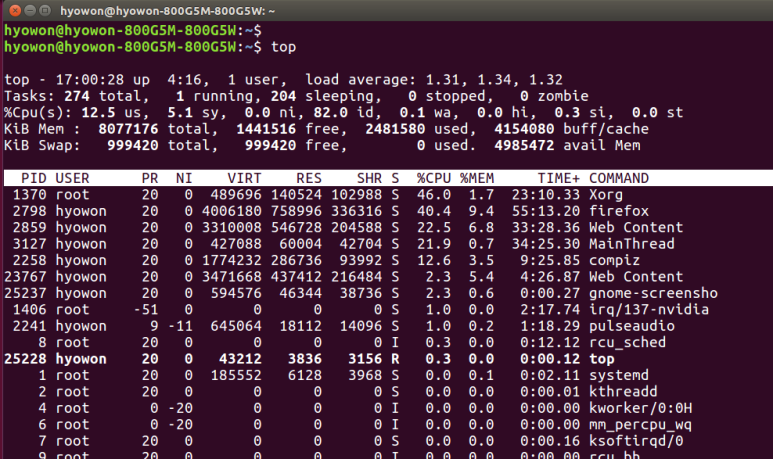
Like ps, top has many options. For more information, please refer to the table below.

2. Stop the process
In Linux, processes process data using predefined signals for interprocess communication. Signals are described in the table below.

The kill command is a command that can be used to terminate a process. To use the kill command, enter the process ID searched with ps or top after the kill command to terminate it. When the kill command is executed, the TERM signal is usually sent from the table above. If the process does not respond, It terminates by sending an INT or HUP signal. When killing multiple processes rather than per process, you can use the killall command to kill the processes at once. The killall command can use wildcards to help kill similar processes at once.
3. Monitoring disk utilization
As explained in the previous article, Linux combines all disks into one virtual directory. When adding a physical disk, it must be combined into a single virtual directory before using the disk, which is called mounting.

The above screen shows 4 pieces of information, and you can see the location of the storage device, the mounted location, the file system type, and the access right of the mounted device. To mount, enter the relevant information in the order of the commands below to mount. mount -t file type location of the device to be mounted mount point location directory For example mount -t vfat /dev/sdb1 /media/disk When this command is executed, the vfat type file system in /dev/sdb1 is mounted on /media/disk. The mount command also has several option values, and the description of each option is as follows.

When removing a mounted disk, always unmount it first. Unmounting can be done through umount, and how to use it is by entering the command in the form below.
Command Syntax: umount [directory | device ] :
Usage example:
[root@testbox boot]# cd /home/rich
[root@testbox rich]# umount /home/rich/mnt
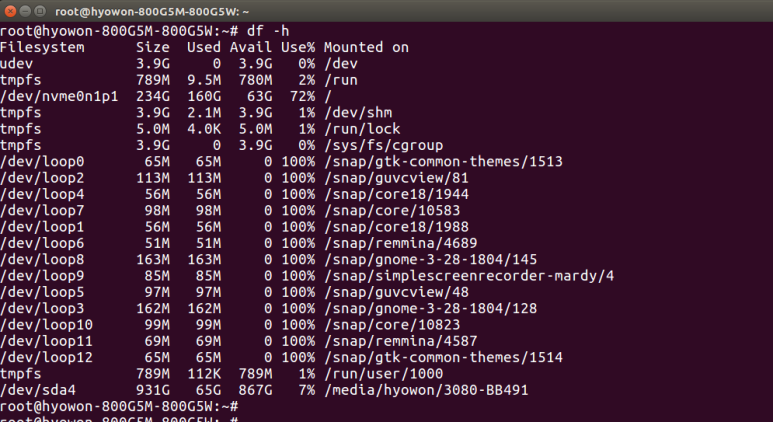
Previously, I tried adding (mounting) and removing (umount) a disk. Now let's look at the df command to monitor disk usage.

When you run the df command in the terminal, 6 fields are displayed by default.
- Filesystem: Shows the physical location of the device.
- 1k-block: Shows how many 1k-byte blocks have been allocated.
- used: Shows how many blocks are used.
- Available: Shows how many blocks are available.
-Use%: Shows the usage percentage as a percentage.
-mount on : Tells the mount point.
If you look at the df result above, it shows disk space information in kilo Byte units, which is a bit inconvenient for humans to see. In this case, if the -h option is used, the more readable jumbo megabytes are displayed in gigabyte units.
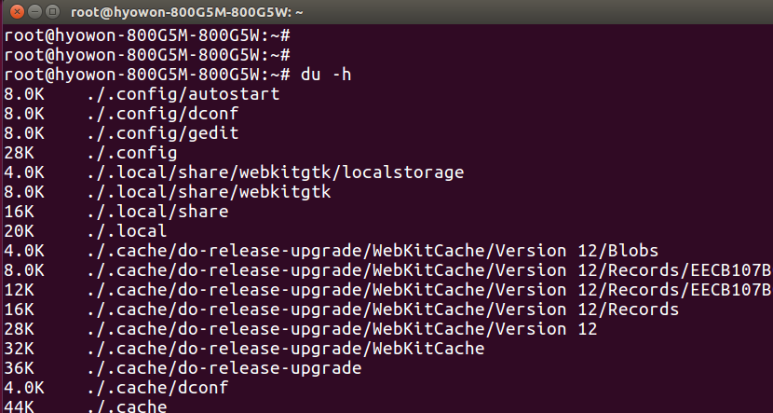
I checked the remaining capacity and used capacity of the disk through the df command. But what if the disk is almost used up? A useful command in this case is the du command. The du command shows the disk usage of a specific directory, so you know which directory is taking up the most disk space. When the du command is executed, the usage of the current directory and the subdirectories below and below it are displayed. du has three optional parameters: -c displays the total, -s displays the summary value, and -h displays the usage in megabytes or gigabytes for human-readable format.
4. Handling large amounts of data
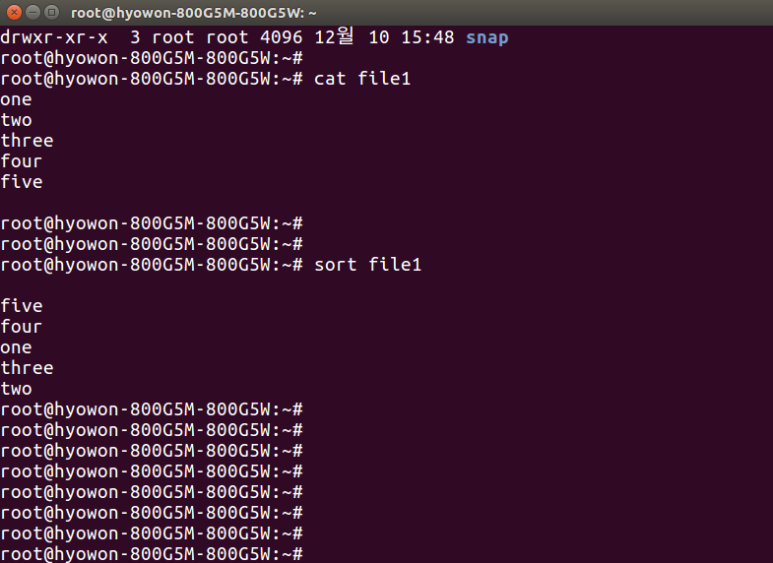
If there are millions of lines of data in one file, it is very difficult to process and manage the file. A good command to use in this case is the sort command. The sort command literally sorts data. The sorting method sorts according to the standard defined rule according to the language set in the system. If you input 1 to 5 in file1 in English and use the sort command to sort them, they are sorted in the largest order.
Then, this time, we will randomly input numbers into file2 and sort them.
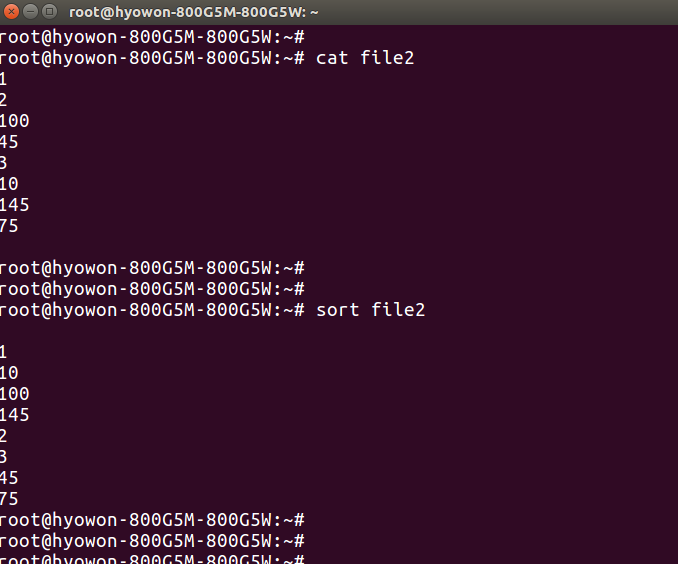
The result is different from what we expected. The reason is that the sort command sorts based on the first number, so when looking at 100 and 45, 1 is lower than 4, so it is displayed first. To solve this problem, if you give the -n option, you can get the desired result because all data is treated as a number.

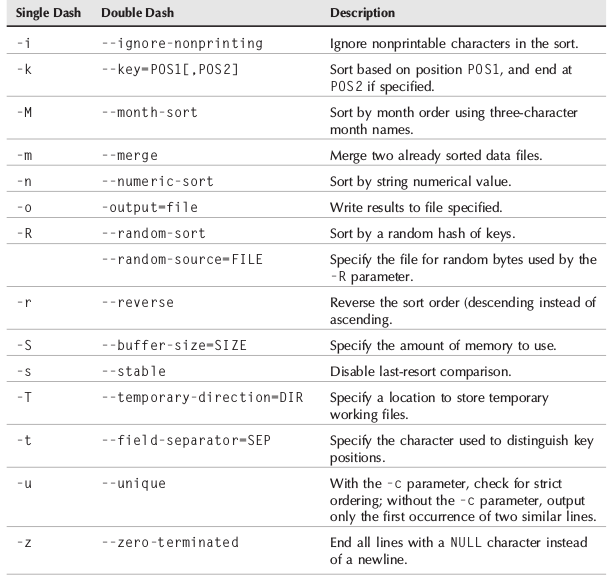
The sort command also provides many options, but let's run an example using the -k and -t options, which are commonly used. First of all, -t is used to define the delimiter of data in the file, and -k is used to define how many times to sort the data among the data separated by the delimiter. The command below sorts the third value (userid) among the data separated by semicolons (:) in the /etc/passwd file.
$ sort -t ’:’ -k 3 -n /etc/passwd

The table below summarizes the option values of the sort command.
The grep command is a useful command for data search along with the sort command. You can use grep in the following format.
- grep command format: grep [options] pattern [file]
- Example of use
$ grep three file1 (if searching for three ) three
$ grep t file1 (search for lines starting with t in file1) two three
$ grep -v t file1 (print only lines that do not start with t)
$ grep -n t file1 (prints with the number of lines starting with t)
$ grep -c t file1 (displays the total number of lines beginning with t)
$ grep -e t -e f file1 (print lines beginning with t or beginning with f)
The size of the data is large and may need to be compressed. There are gunzip and other compression tools, but here I will explain how to compress using gzip. The format of using the gzip command is to enter the gzip file name to perform compression. gzip can compress multiple files at once by using a wildcard (*).
- Example usage:
$ gzip my* (compress all files starting with my)
Although gzip allows file compression and data archiving, most administrators use the tar command for archiving. How to use tar is as follows.
- Syntax: tar function [options] object1 object2
The types of functions of the tar command are described in the table below.

The option values of the tar command are as follows.

The tar command is usually used in three cases: when archiving, checking the contents of the archived file after archiving is complete, and unpacking the archived file. Please refer to the example below.
Archiving is usually used as a data backup concept, and when some files are deleted or damaged, the previously archived files are moved to the same directory and extracted to recover damaged or deleted files.
How to use is as follows.
- Data archiving: Archive test and test2 directories and all files in test.tar.
$tar -cvf test.tar test/ test2/
- Retrieve archived data:
$tar -tf test.tar
- Unpacking archive files:
$tar -xvf test.tar
'Shell Script' 카테고리의 다른 글
| 6. Basic Shell Script writing (3) | 2022.08.11 |
|---|---|
| 5 Linux File Permission (2) | 2022.08.11 |
| 4 Environment variables (1) | 2022.08.11 |
| 2.Bash Shell Basic Command (6) | 2022.08.10 |
| 1 Linux command Line (3) | 2022.08.10 |