
Today's post is about Amazon Load Balancer.
Among them, I would like to post about how to use Network Load Balancer (NLB).
First of all, the diagram to be configured today is as shown above.
Place NLB in front of Web server 1 and 2 servers. Whenever a service request comes
Let's look at how to distribute to Server1 and Server2 respectively.
First of all, servers 1 and 2 were created as EC2 instances in advance as shown in the figure below.
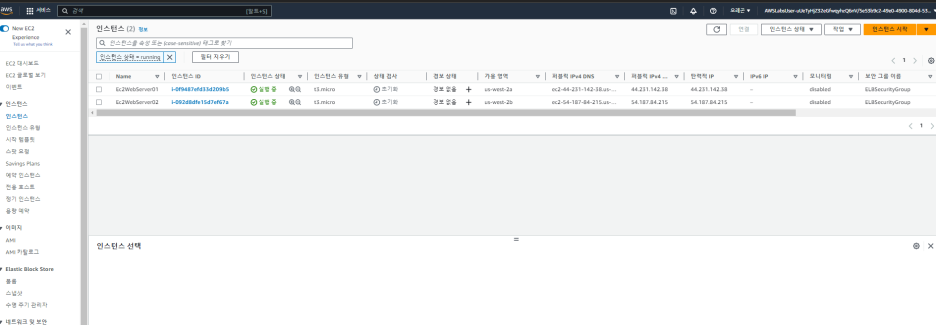
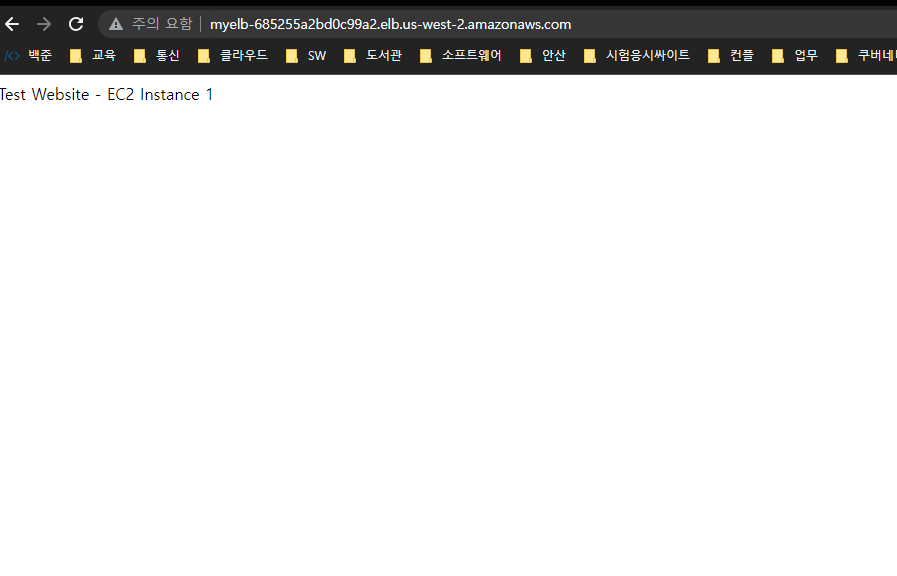
Paste the addresses for ec1 and ec2 in a web browser to see if the server is operating normally, and check if the service is normal.
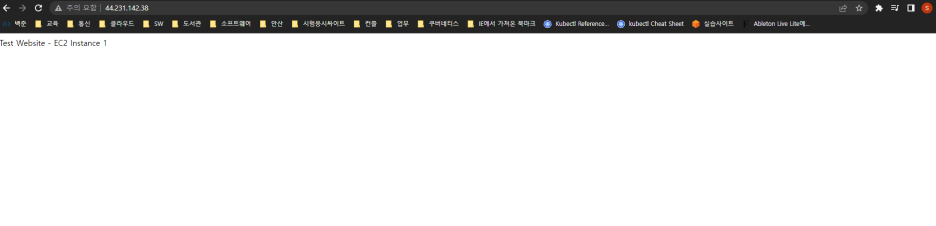

As shown in the screen above, Test Website EC2 Instance 1 and 2 confirm that the web service is normal.
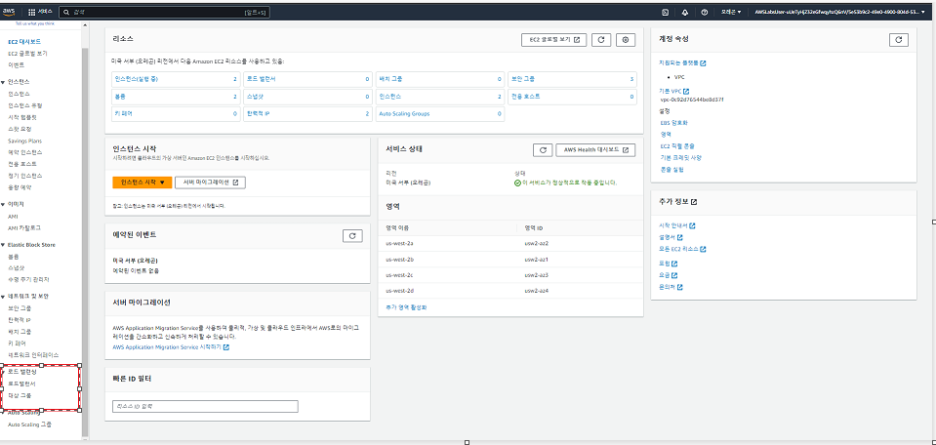
Now, to create the NLB, search for EC2 in the Amazon console window, and click Load balancer as shown in the screen below.
Click Create Load Balancer as shown below.

As shown in the figure below, click the Create button under Network Load Balancer among Load Balancer Types.

As shown in the figure below, the Load Balancer Name is given the name you want to give, and it is an NLB located in the public subnet.
Click Internet-facing, then click IPV4.

In the Network mapping section, click the Lab VPC we will use.
Click two AZ (Available Zones) in the Mapping part.

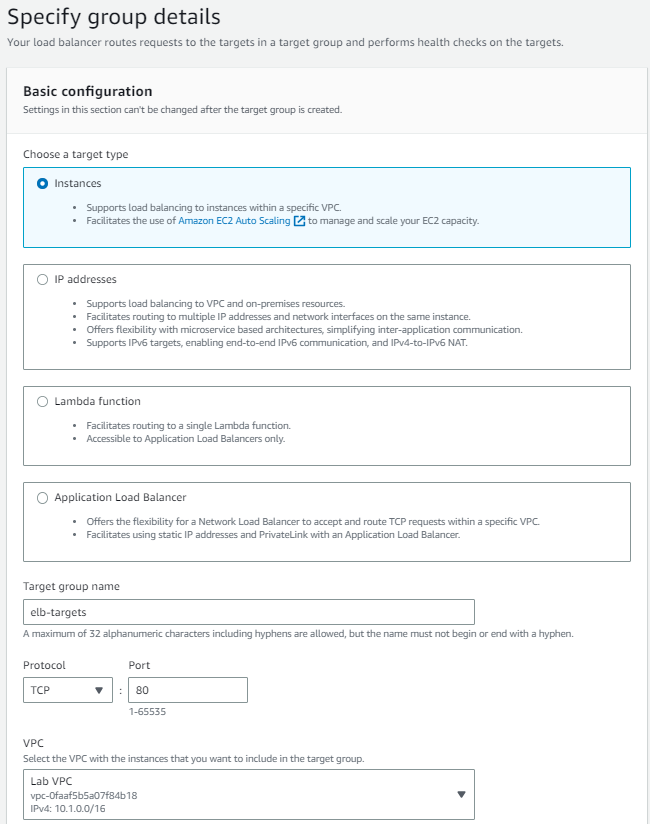
In the Listener and routing section, click create target group.

In this exercise, since the target group (where NLB will distribute service requests) is EC2, select Instances for Target group Type, enter the desired name for target group name, select 80 for TCP Port for Protocol,
VPC selects the VPC we will use.
Set Advance health check setting as below.

The load balancer sends a health check request to each registered target every HealthCheckIntervalSeconds seconds using the specified port, protocol, and ping path, and waits for the target to respond within the response timeout period until the health check exceeds the threshold for consecutive failure responses. Doing so will cause the load balancer to take the target out of service.
If you interpret the above setting value. When you get five responses, you decide that the service is normal,
If two consecutive service responses are not received, it is considered a failure.
Now that the settings are complete, click the Next button.
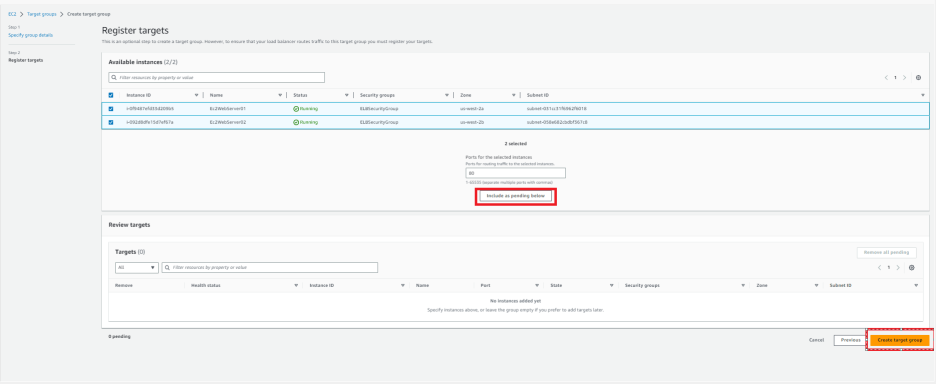
Select 2 EC2 Instances to include in the target group and click the include as pending now button.
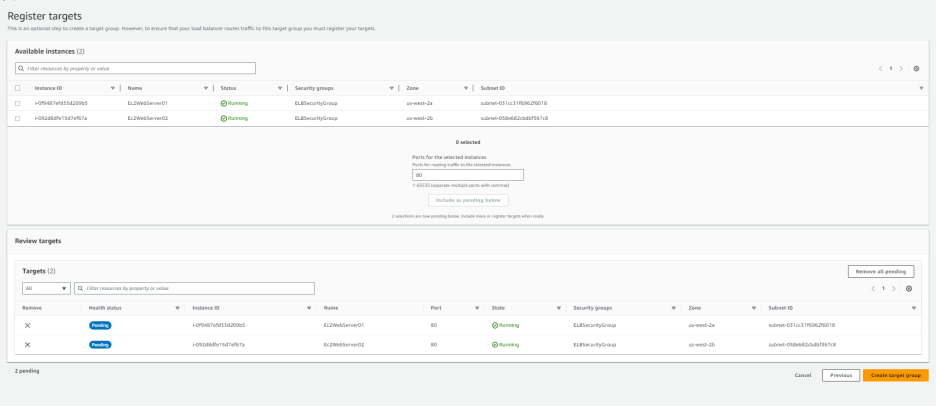
Then, as shown at the bottom of the screen above, confirm that two EC2s in pending state are included and click the create target group button.
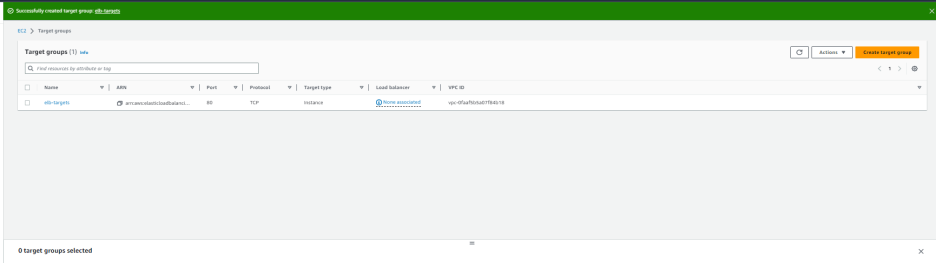
Click refresh on the screen above and click the target group that appears.
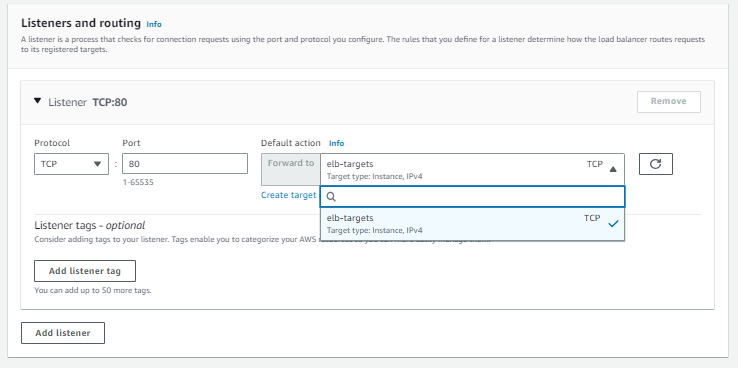
Now go back to the listener and routing part and click on the created target.
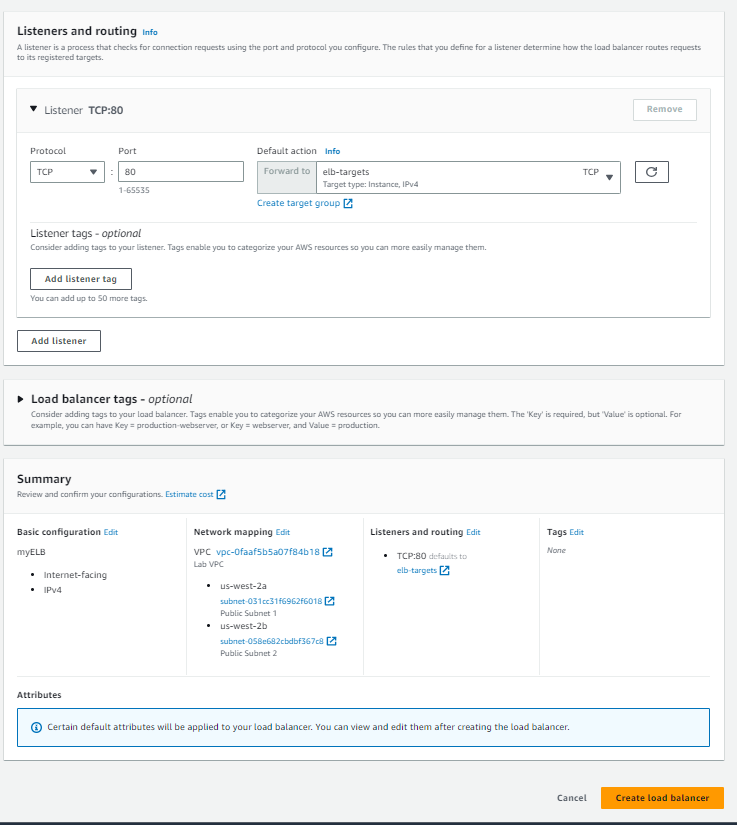
Then click the create load balancer button.
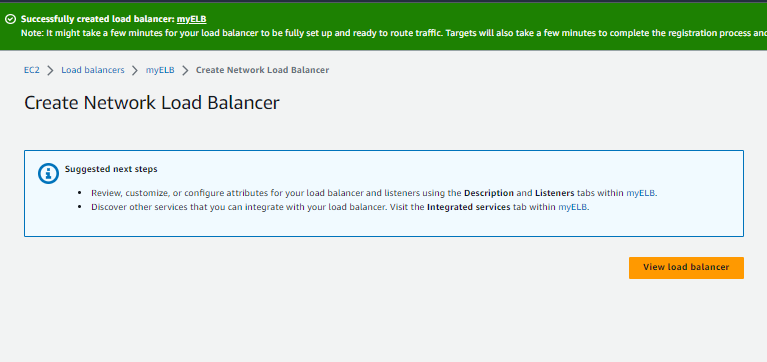
Click the view load balancer button.
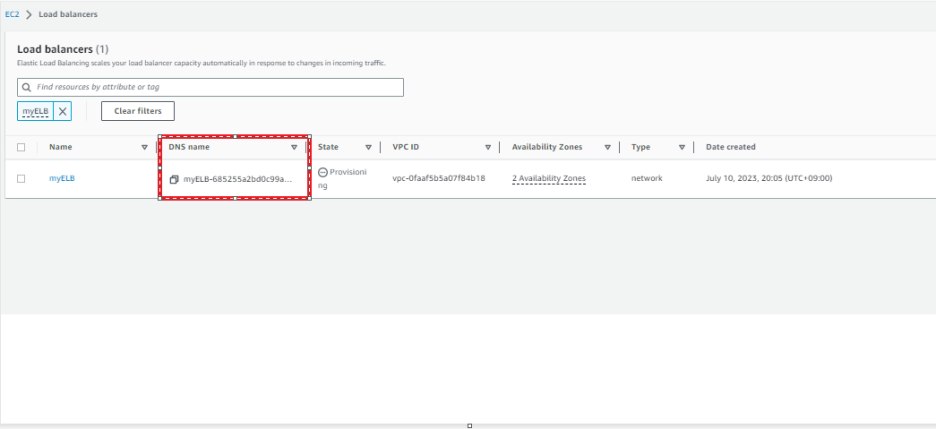
Now copy the DNS Name to notepad.

Click the created elb-target.
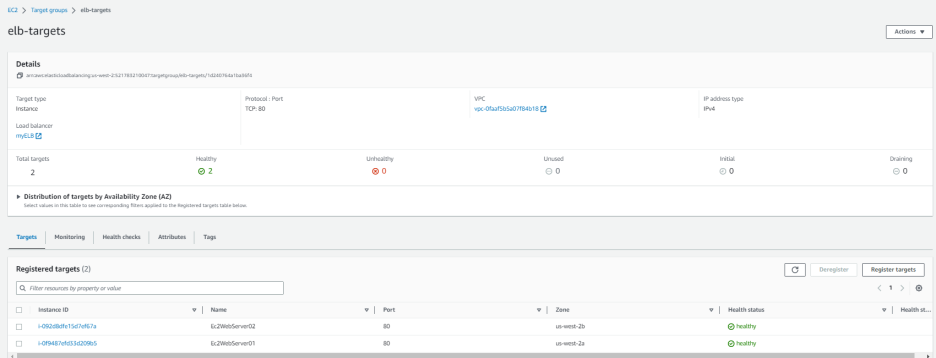
Wait until the contained EC2 instances become healthy.
State descriptions of EC2 step-by-step are as follows:
initial: The load balancer is registering the target or performing an initial health check on the target.
healthy: The target is healthy.
unhealthy: The target did not respond to health checks or failed health checks.
unused: The target is not registered with the target group, the target group is not used in a listener rule for the load balancer, or the target is in an Availability Zone that is not active for the load balancer.
draining: Target is unregistered and Connection Draining is in progress
Paste the DNS name of the Target Group that you copied earlier into your web browser.

Even if you paste and run it several times, you can see that traffic continues to flow only to ec2 Instance 2.
Enabling the cross-area function allows even distribution of service requests to Server 1 and Server 2.

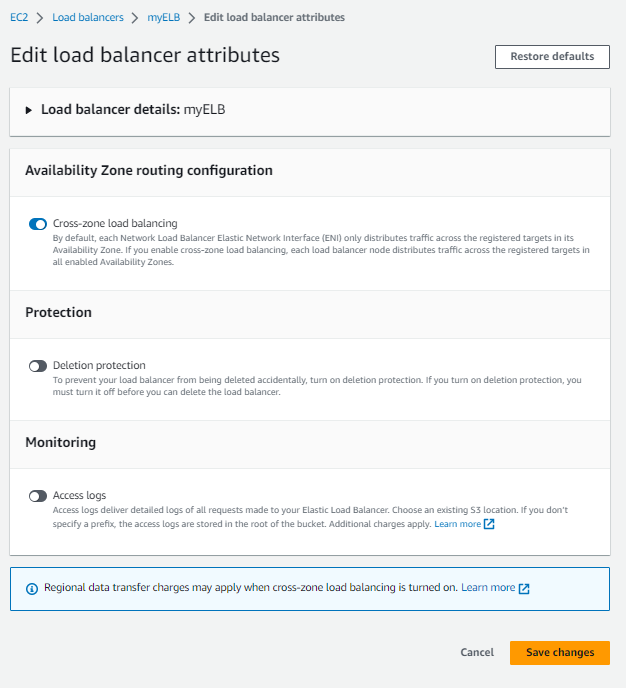
As shown in the picture above, click enable cross-zoneload balancing and click Save changes.
Now wait for 1 to 2 minutes until the applied value is set,,,
Open a web browser and paste the previously copied DNS address of the target group in the web browser window and hit enter.

'AWS Cloud' 카테고리의 다른 글
| [클라우드] AWS Simple Storage S3 사용하기 (128) | 2023.08.03 |
|---|---|
| [Cloud] Creating Amazon VPC and RDS (25) | 2023.07.29 |
| [Cloud] Using CodeCommit. (42) | 2023.07.15 |
| [Cloud] Using Amazon EKS Auto scaling (82) | 2023.05.18 |
| [Cloud] using AWS CI/CD -2 using Codepipeline (0) | 2023.05.14 |