
Today, I'm going to post an article related to cloud for the first time in a while.
As in the diagram above, using the Amazon WEB service
Let's create a VPC with 1 public subnet and 2 private subnets, a total of 3 subnets. The web server is hosted on a public subnet so that it can connect to the public internet.
MySQL RDS (database) instances are hosted in private subnets. To use a DB instance ( MySQL RDS ) in a VPC, the VPC must have at least two subnets.
These subnets should be located in different availability zones (AZs) in the AWS Region where you want to deploy your DB instances.
Creting VPC
- Then, we will proceed with the following process.
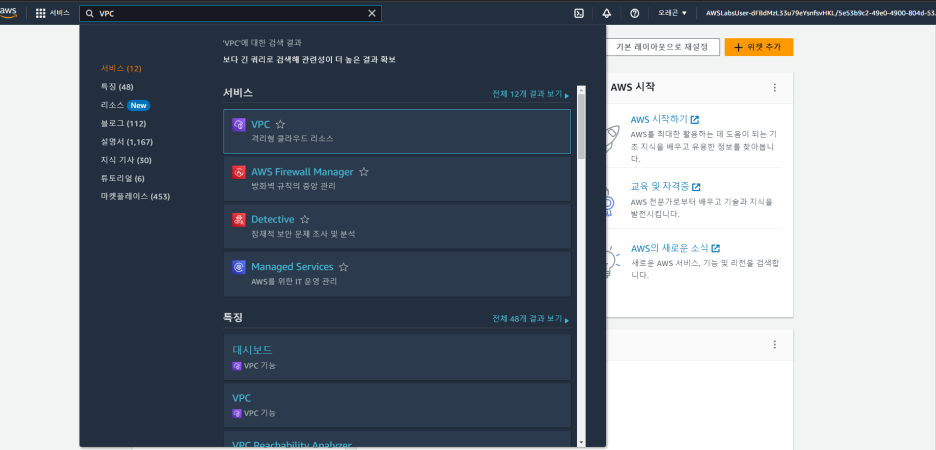
After logging in to aws, enter VPC in the search bar and click VPC below
2. Click Create VPC and enter the following in each item.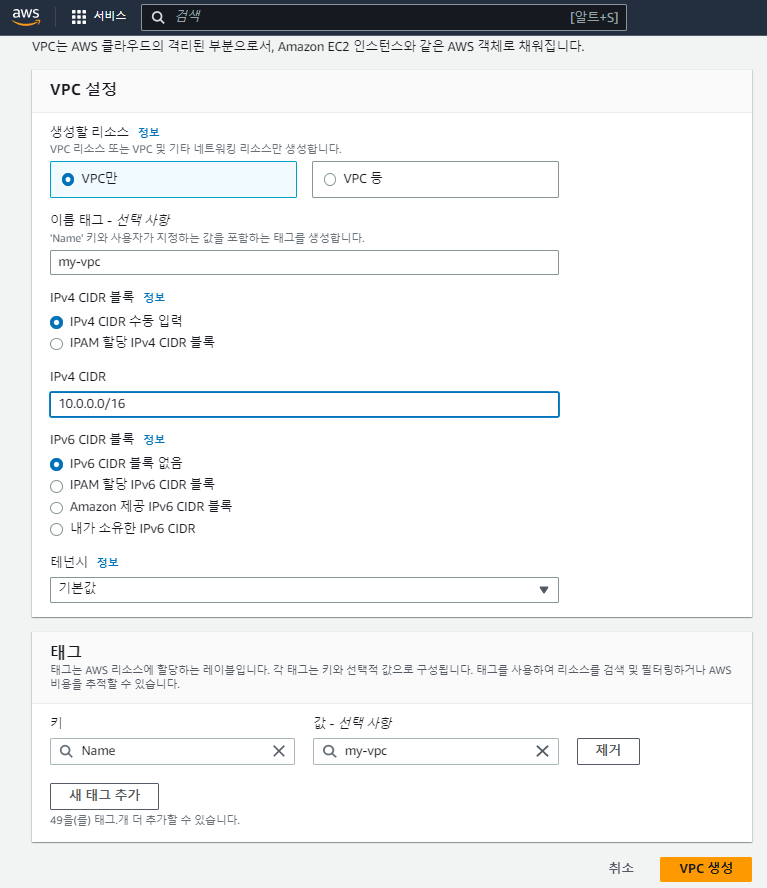
Resource to create: select VPN only
NameTag: my-vpc
IPV4_CIDR: 10.0.0.0/16
After entering the above three values, click the Create VPC button.
Creating Public Subnet
Follow the procedure below to create a public subnet to be included in the VPC.
1. Select 'Subnet' from the left menu and click the 'Create Subnet' button.

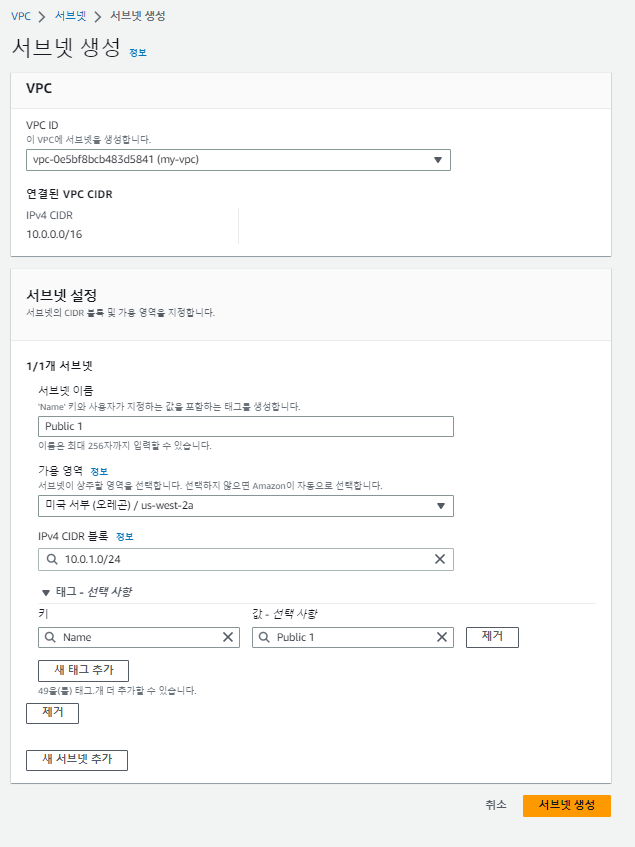
2. On the subnet creation screen, enter the values below and click the 'Create Subnet' button.
VPC ID: Click the drop-down button to select the VPC you created earlier.
Subnet Name: Enter Public 1.
Availability Zone (az): Click the drop down button to select the first Availability Zone.
CIDR: Enter 10.0.1.0/24. (CIDR must be entered in a range less than the VPC's CIDR)
Creating Internet Gateway
- Now create an Internet gateway to make the Public subnet created above accessible from the Internet.
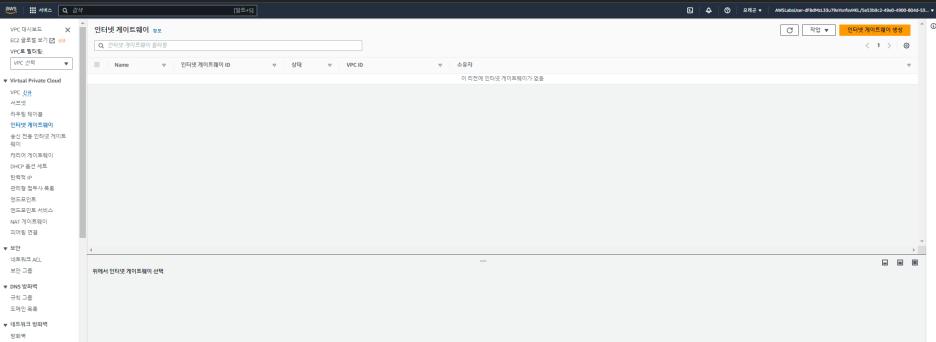
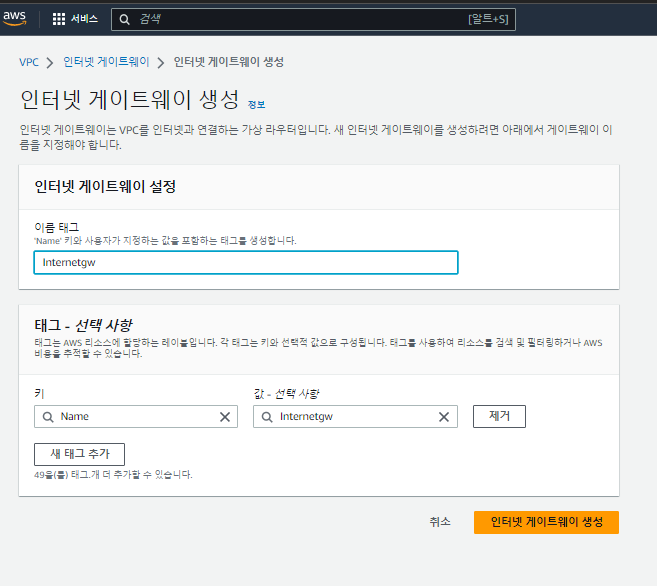
Select Internet gateway from the left menu and click the Create Internet Gateway button.
2. Enter the values below and click Create Internet Gateway.
Name tag: Internetgw
3. Click the 'Action' button on the screen below and click Connect to VPC.

4. In the screen below, select the VPC you created earlier from Available vpc and click Internet gateway connection.
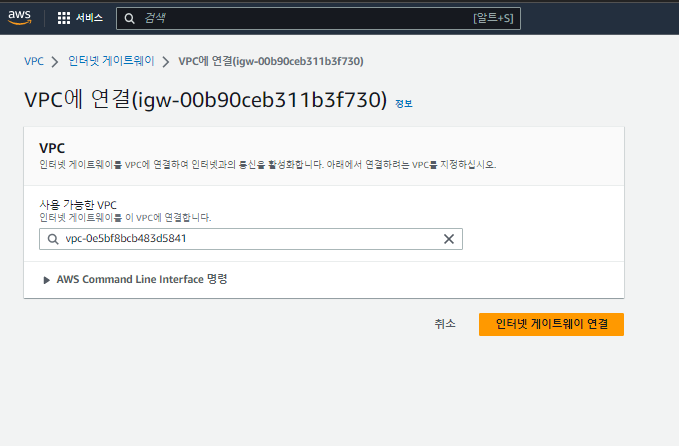
5. Now the internet gateway is connected to the vpc as shown in the screen below.

Creating routing table, adding route and connect to public subnet
- There is one main route table associated with the VPC that has just been created (my VPC), and this table routes traffic locally by default. Follow the steps below to create additional route tables that route public traffic to the internet gateway.
Click the 'Routing Table' menu on the left menu.

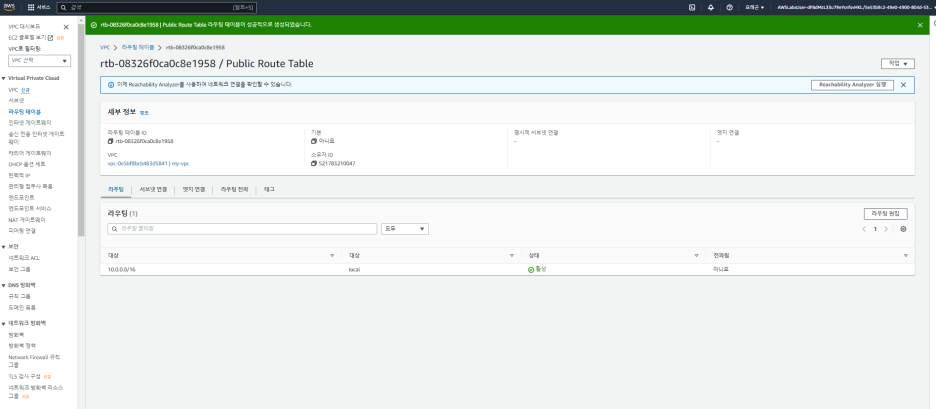
2.In the screen below, enter the values below and click 'Create Routing Table'.
Name: Public Route Table
VPC: Choose the VPC you created earlier

3. After creating the route table, there is one route table forwarding the traffic locally as shown below. Now click the Edit Routing button for routing to the Internet Gateway.
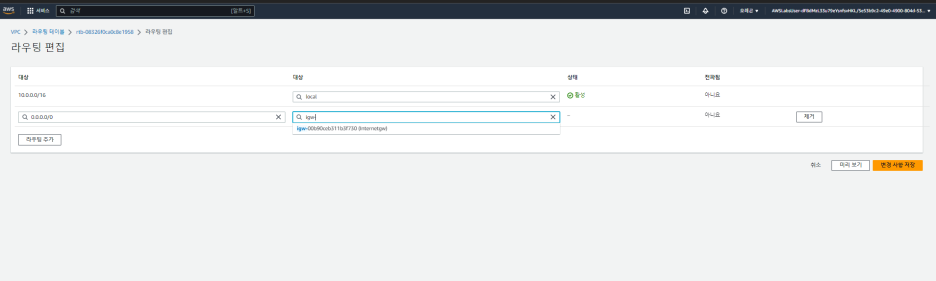
4. Click the Add Routing button and enter the values below.
Destination: Enter 0.0.0.0/0
If you select :Internet gateway for the second target, you will see the gw we created. Then click on that gw and click Save Changes.
5. Now, click the 'Subnet Connection' tab, select Public subnet, and click the 'Save Connection' button.
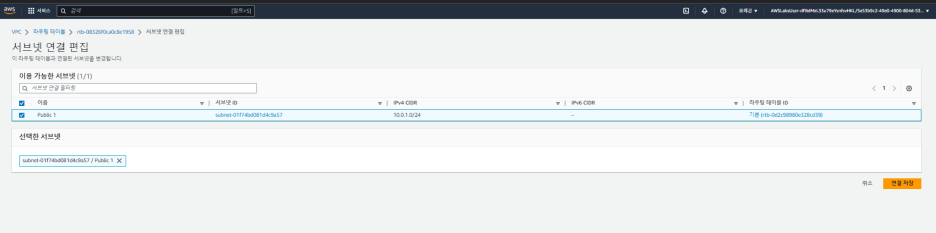
Now, since the subnet created as Public Subnet is connected to the Internet gateway, it operates as Public
Creating security group for Web Server
- Now you need to create a security group, which acts as a virtual firewall that controls inbound and outbound traffic to your instance. When you launch an instance into a VPC, you can assign up to 5 security groups to your instance.
Security groups work at the instance level, not the subnet level, so each instance in a subnet in a VPC can be assigned a different set of security groups, and if you don't specify a specific group when an instance launches, the instance will automatically be assigned to the VPC's default security group. is assigned to.
Now let's create a security group according to the procedure below.
Select the 'Security Group' menu on the left menu, click Create Security Group, and enter the values below.
Security group name: Web server
Description: My Web Server Security Group
VPC: Choose my VPC

2. Click the Add Rule button in Inbound Rules, enter the information below, and click Create Security Group.
Type: http
Source: ANYWHERE-IPV4

start web server in public subnet
- Now let's create and start a web server running the Address Book application.
At the end of this blog, we will deploy this address book application to an Amazon RDS for MySQL instance.
Connect.
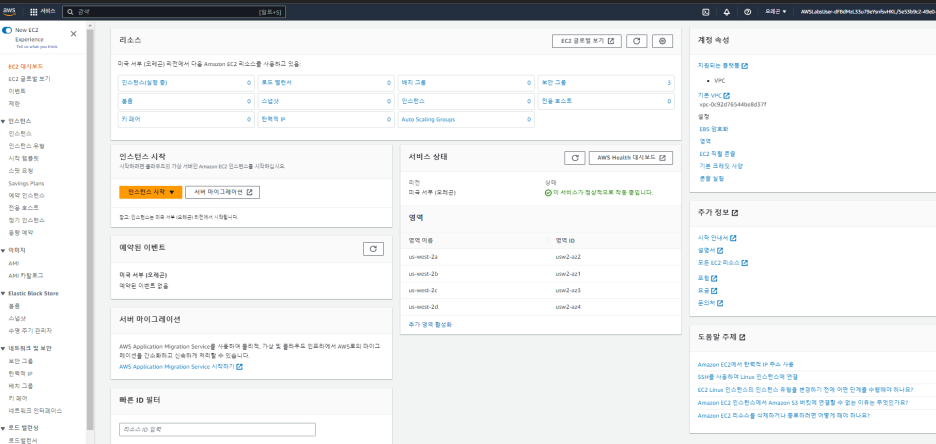
Enter EC2 in the AWS Service search bar and select.

2. Click Start Instance and enter the values below.
3. In the Name and tags section, enter Web Server.

- 4. In the Key pair (login) section, choose Proceed without a key pair.
In the Network settings section, click Edit
Choose VPC, My VPC. Note - Public 1 is populated under the Subnets section
Under Firewall(Security groups), Select an existing security group
Select Common security groups and select Web server.

5. Expand Advanced Details (bottom of the page).

6. After expansion, copy and paste the script below to the user data part of the screen below.

script content
#!/bin/bash -ex
yum -y update
yum -y install httpd php mysql php-mysql
chkconfig httpd on
service httpd start
cd /var/www/html
wget https://us-west-2-aws-training.s3.amazonaws.com/courses/spl-13/v4.2.27.prod-ce5abbb0/scripts/app.tgz
tar xvfz app.tgz
chown apache:root /var/www/html/rds.conf.php
7. Click the Start Instance button and click the View All Instances button.

8. Wait until the status of the instance shows as Running, then click web-server.
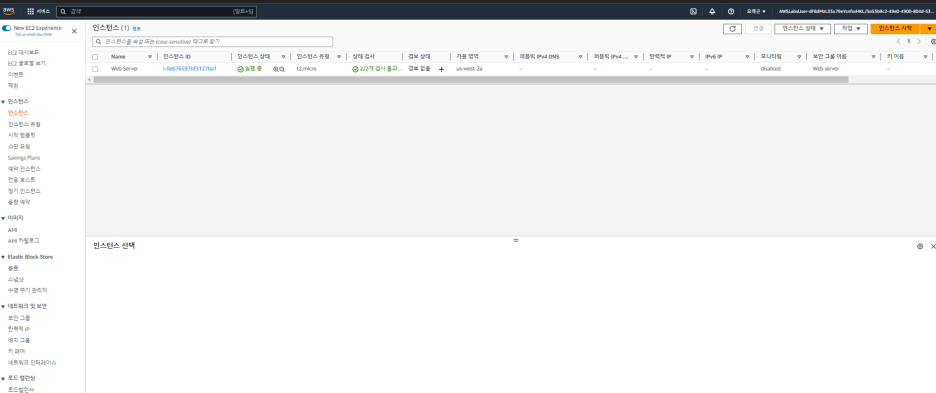
9. Then, the details of the instance appear as shown below, and copy the Public IP among them.
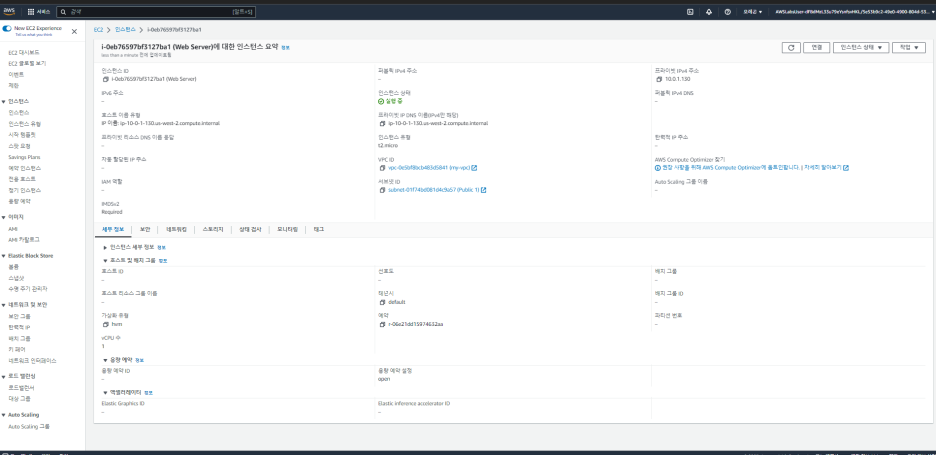
10. Open a web browser on the local computer, enter the IP address in the address bar, and press Enter.
Then, you can see the address book input window appears as shown below.

Creating Subnet for DB
- Enter VPC in the service search bar.

2. Select Subnets from the left menu.

3. Select the values below and click Create.

vpcid: select a previously created VPC
Availability Zone: First AZ selection
IPV4 CIDR: 10.0.2.0/24
4. To create the second subnet, click the 'Create Subnet' button, enter the values below and click the Create button.
VPC ID : Existing VPC
Subnet Name: Private 2
Available service: Select second AZ
IPV4 CIDR :10.0.3.0/24

Creating Security Group for DB
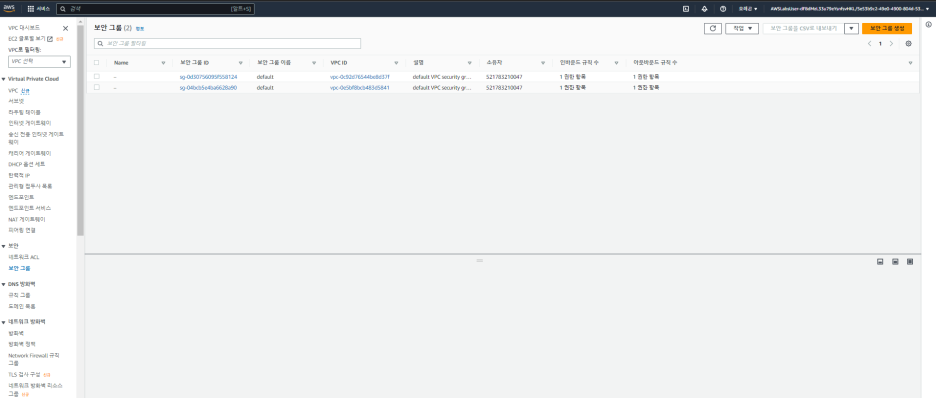
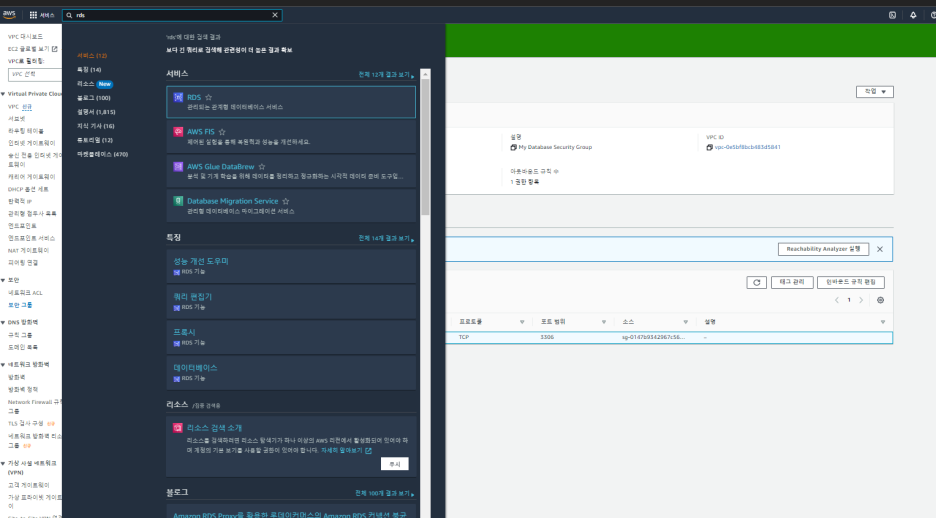
1.Select Security Groups from the left menu and click the web server security group created previously.Copy the security group ID value to a separate notepad

2. After selecting Security Group from the left menu, click Create and enter the values below.
Security group name: Database
Description: My Database Security Group
VPC: Choose my VPC

- 3. In Inbound Rules, click the Add Rule button, enter the values below, and click Create.
Type: MySQL/Aurora
Note: Choose MySQL, not MSSQL.
Source:
Custom
Paste the copied web server security group ID into a text editor

From now on, it is an environment where the web server and DB can communicate.
Creating subnet group for DB
- Amazon RDS instances require a database subnet group. Let's create this subnet.
In the service search box, type RDS to search for the service.
2. Select Subnet Group from the left menu pane.

3. After clicking Create Subnet Group, enter the values below and click Create.
Name: My Subnet Group
Description: My Subnet Group
VPC: My VPC
Availability zone: Select the first and second Availability Zone from the list.
In the Subnets section, choose:
10.0.2.0/24
10.0.3.0/24

Creating Amazon RDS
Now, let's create an RDS DB in the created subnet.
1. Click Databases in the left menu.

2. In Create Database, select the values below.
Engine options: MySQL
Version: MySQL 5.7

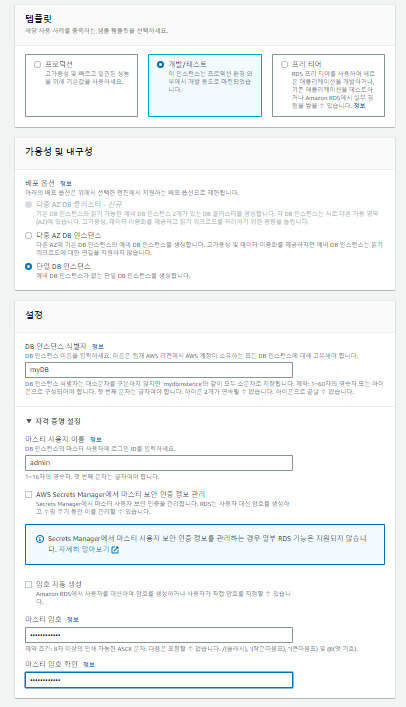
3. In the template and instance settings, set as follows.
- In the Templates section, select Dev/Test.
- In the Settings section, configure:
DB instance identifier: myDB
Master username: admin
Master password: lab-password
Confirm password: lab-password

5. Select the connection part as below.
Virtual Private Cloud (VPC): My VPC
Publicly access: No
Existing VPC security groups:
Add the Database security group.
Remove the default security group.

6. In the Monitoring section, uncheck Enable Enhanced monitoring
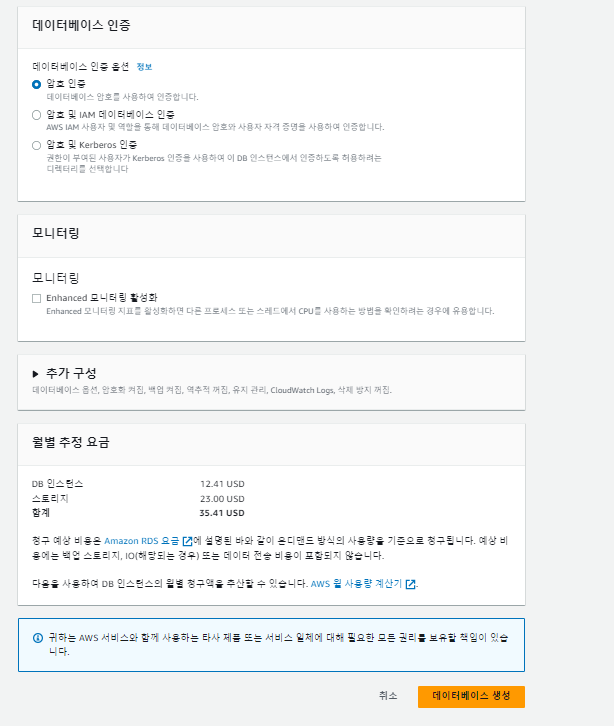
7. In the Additional configuration section (near the bottom), click Additional configuration
Additional Configuration), enter the following, and click Create Database.
Initial database name: myDB
Uncheck Enable automatic backups. This will turn off the backup and in the lab the database will start up a bit faster.
Uncheck Enable auto minor version upgrade

Connect Address Book application to database
Now, let's proceed with connecting web and db.
Click the mydb instance on the screen above and copy the endpoint value.

2. After entering the Public IP of the web server in the Internet browser, press Enter, enter the values below, and click SUMMIT to complete the connection.
Endpoint: Paste the MySQL endpoint.
Database: myDB
Username: admin
Password: lab-password

'AWS Cloud' 카테고리의 다른 글
| [AWS Cloud] Route 53 and Creation of Domain Certificate (112) | 2024.02.22 |
|---|---|
| [클라우드] AWS Simple Storage S3 사용하기 (128) | 2023.08.03 |
| [Cloud] Using Amazon Load Balancer NLB (77) | 2023.07.16 |
| [Cloud] Using CodeCommit. (42) | 2023.07.15 |
| [Cloud] Using Amazon EKS Auto scaling (82) | 2023.05.18 |