Hello neighbors ^.^
Today's posting is about using Route53 among Amazon cloud services
Issue a certificate with the AWS Certificate Manager service to connect to the registered domain
I'll post about how to do it.
1. Registering a Domain
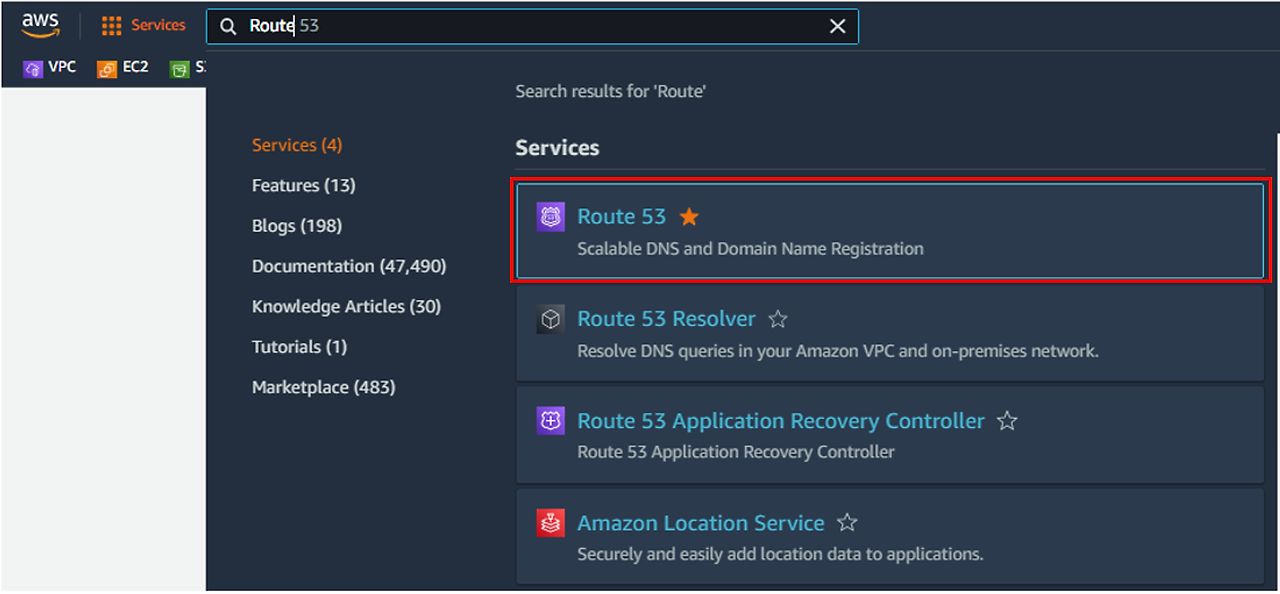
1-1. To issue individual domains, go to Route53 service.
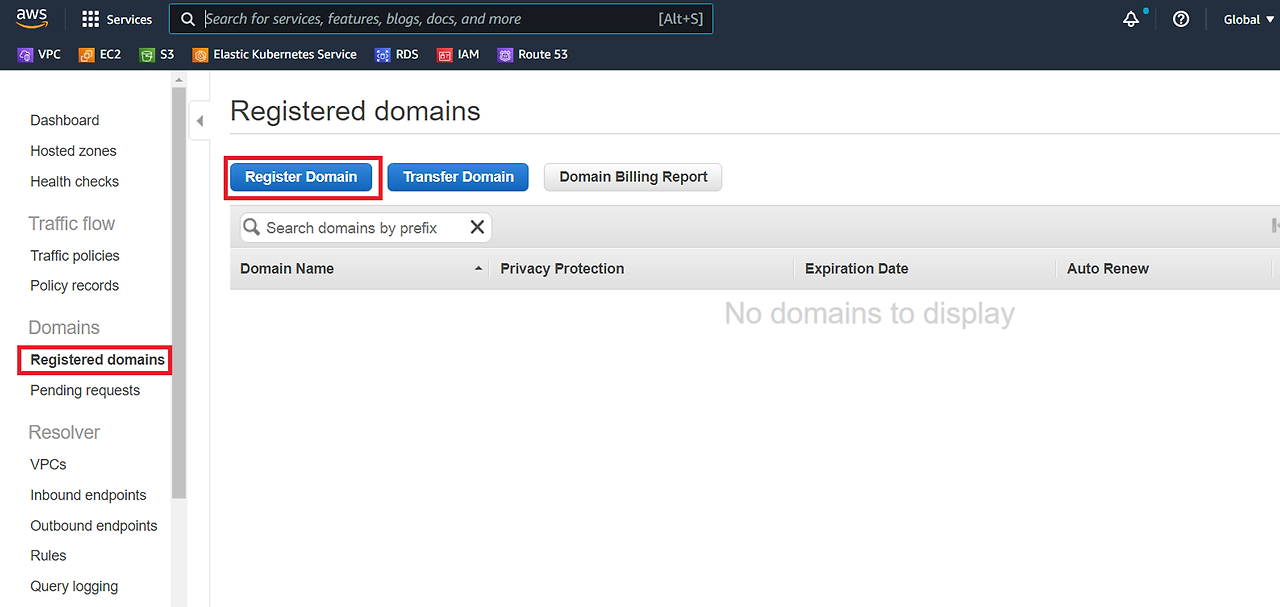
1-2. Go to the Registered domains menu and click the Register Domain button.
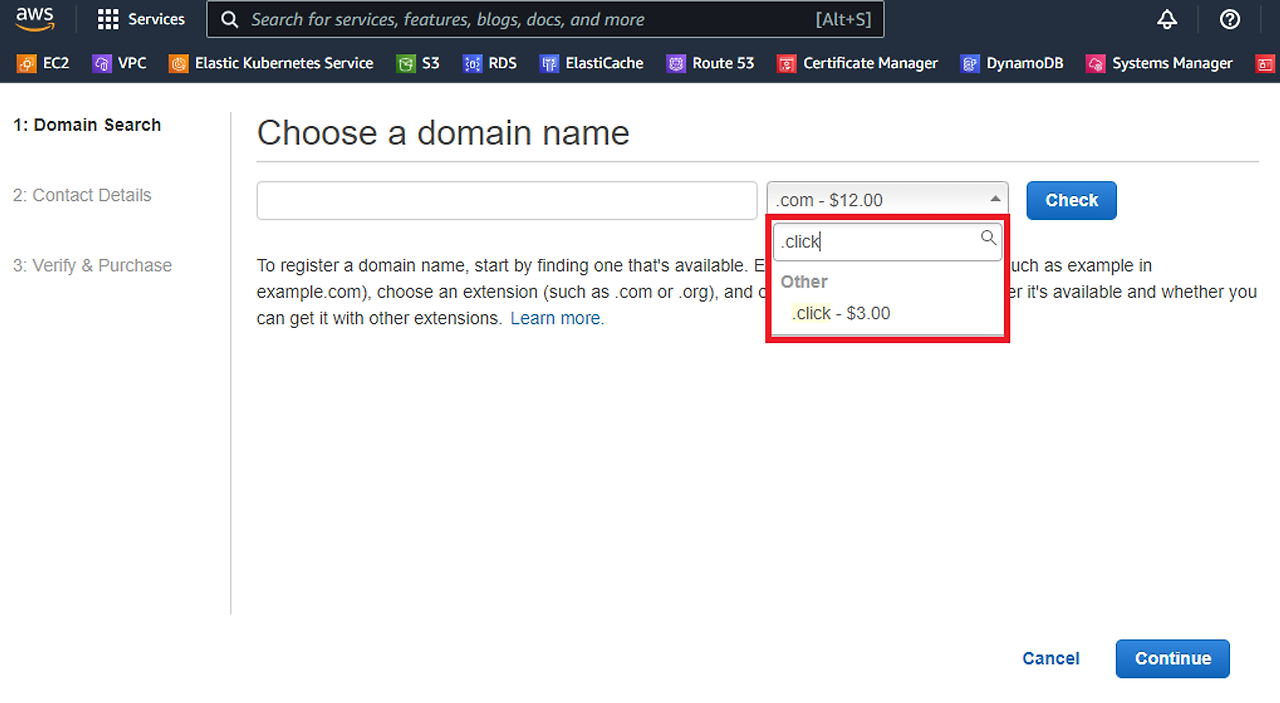
1-3. Mouse-click the part where the domain and cost are shown, and type .click in the search bar and click in the selection bar.
Make sure to select the .click root domain to reduce the cost of issuing the domain.
- 1-4. Enter the domain individually as the only name in the world and click the Check button.
① Check for possible domains: 📌 <<YOUR_DOMAIN>> Separate notes
Search the domain name entered on the screen by clicking the Check button except for .click. Note. If the screen input value is msp-t2, 📌 <<YOUR_DOMAIN>> notes msp-t2.click
② Click the Add to cart button
③ Make sure the annual cost is $3.00
④ Click the Final Continue button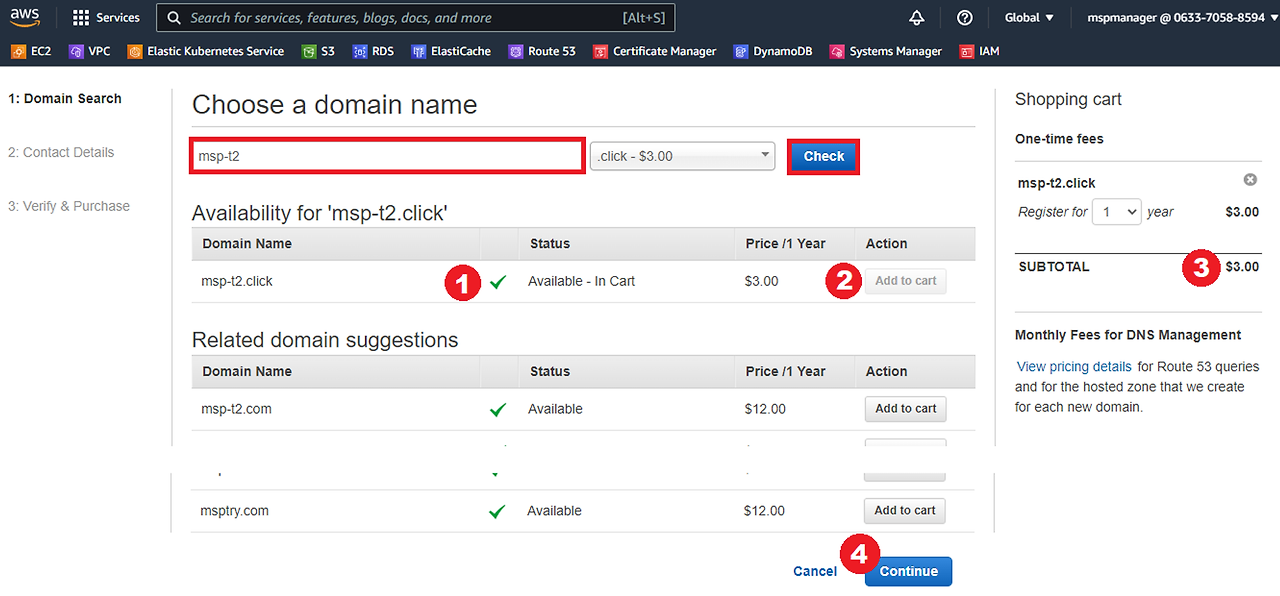
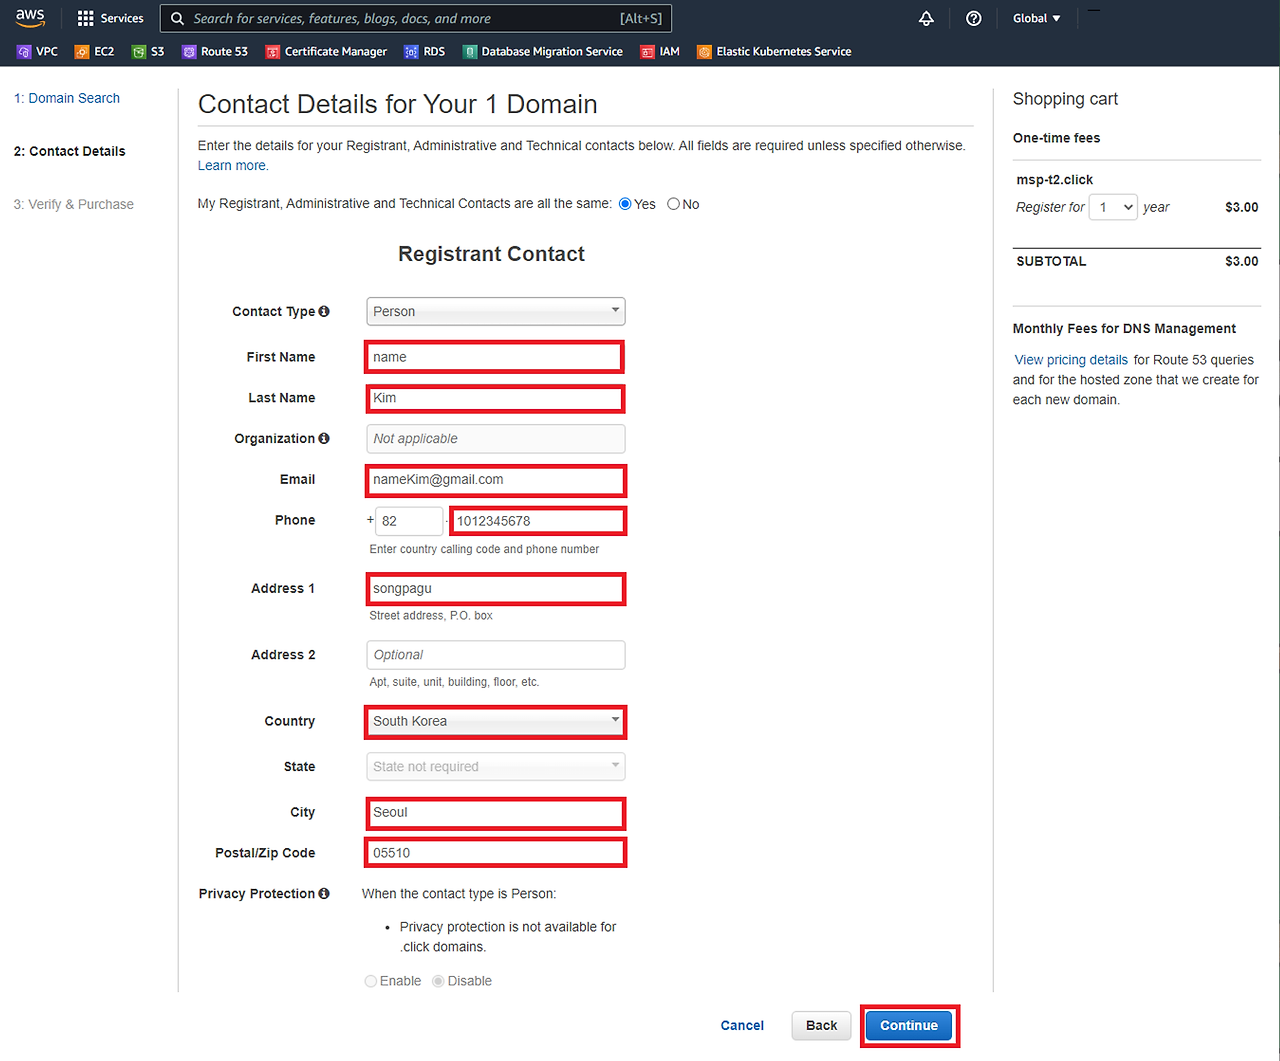
- 1-5. After entering the applicant's valid personal information, click the Continue button.
A confirmation email about the domain registration procedure is sent to the email information entered by each person, so ❗ enter valid email information without fail.
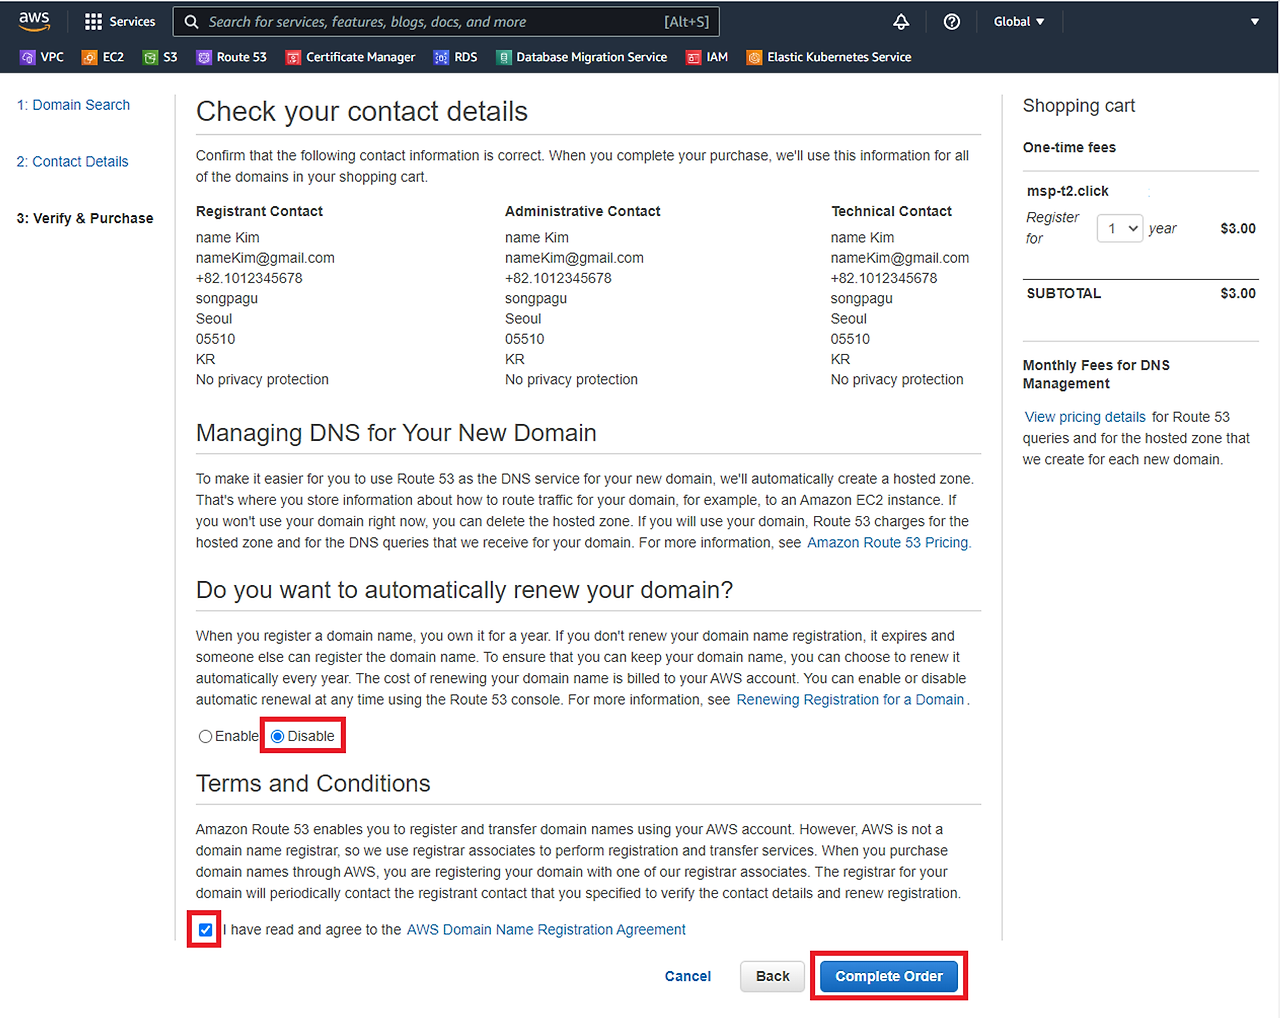
- 1-6. Check the final purchase, complete the domain order.
The ordered domain uses only the training period (approximately 5 days), so choose Disable for auto-renewal items
Check the Term and Conditions entry and select the checkbox ✅
Clicking the Final Complete Order button completes the domain order and costs you.
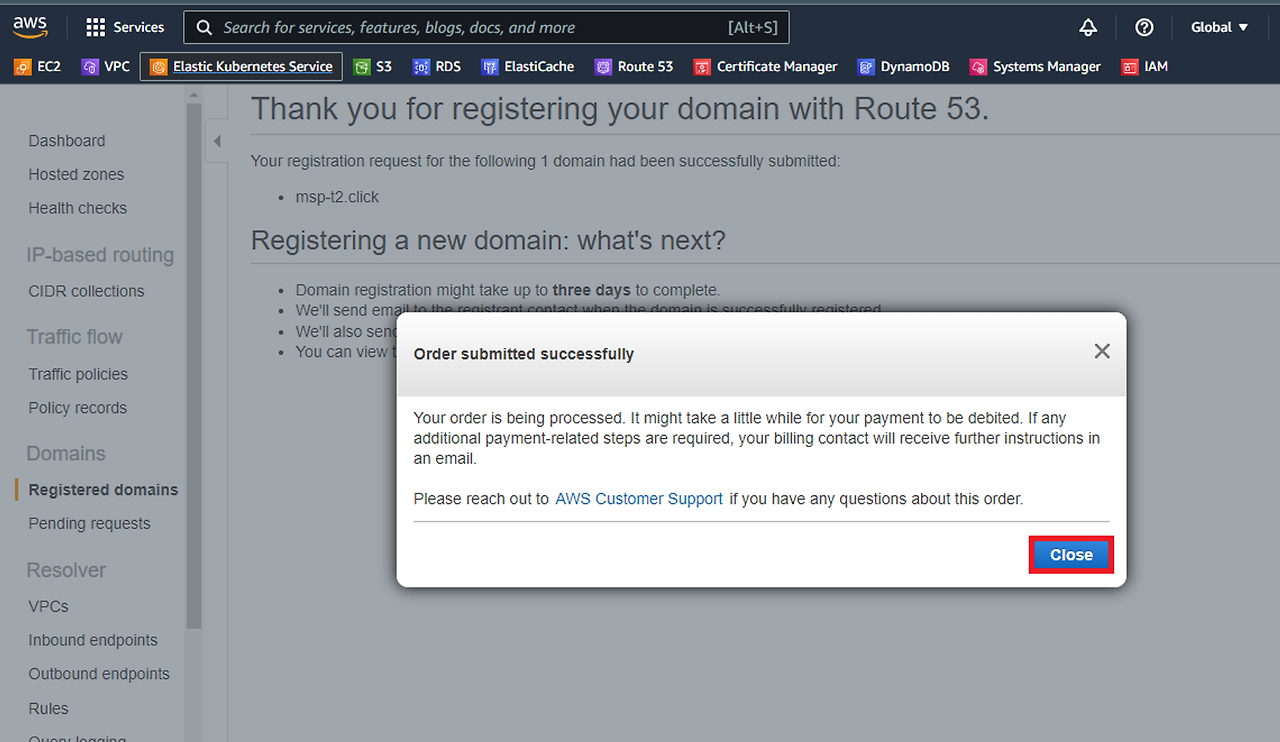
1-7. Click the Close button in the Domain Order pop-up window.
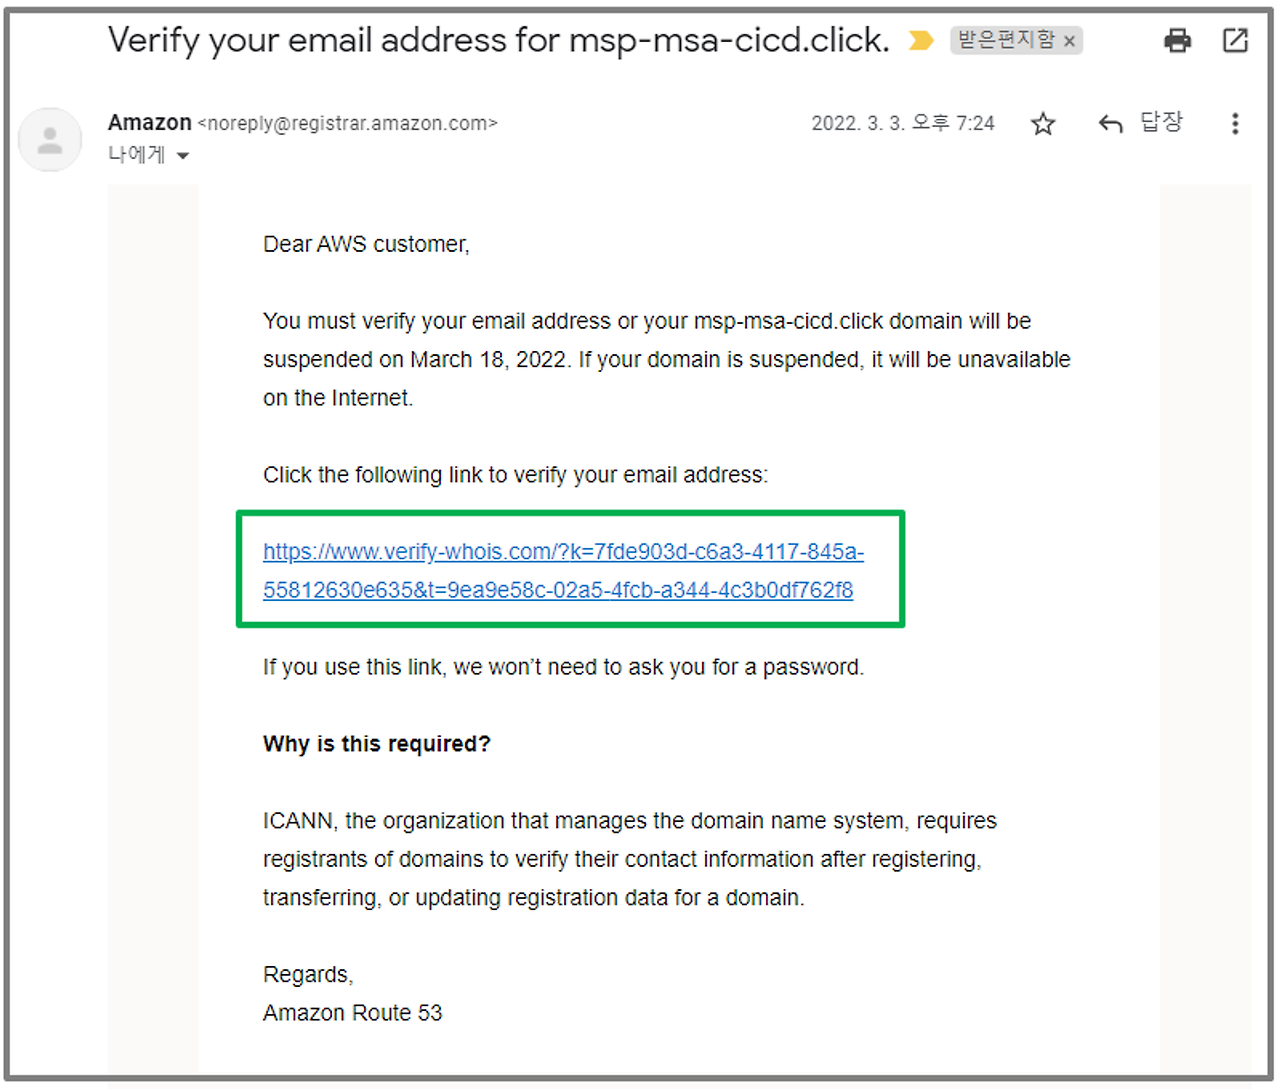
- 1-8. In your private mail inbox, click the link in the domain registration Verify mail body.
The process of registering a domain can take up to 3 days, so if you don't receive the mail below within 10 minutes, check again the next day.
If there is no mail in your inbox, check if there is mail in your spam box.
If you enter your company email address, click the link on the body of the mail through your mobile phone.
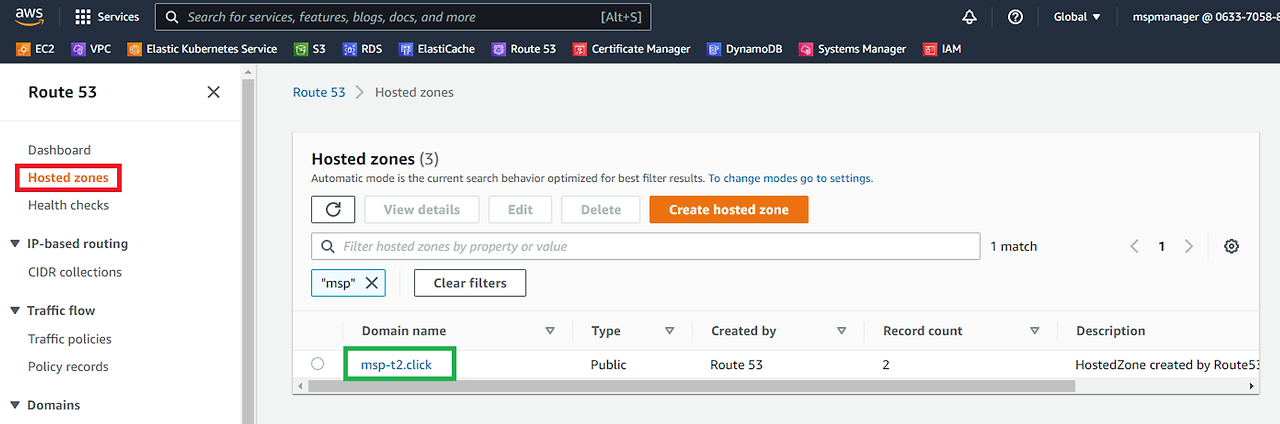
- 1-9. Go to the Hosted zones menu on the left and check if there are any domains you have created.
After performing the above process 5-1-8, it may take about 5 to 10 minutes for your domain to be searched in the Hosted Zones menu.
2. To generate a certificate
On Day 4 of this course, the Certificate Manger (CM) service provided by AWS is used to access the emarket service (TLS communication).
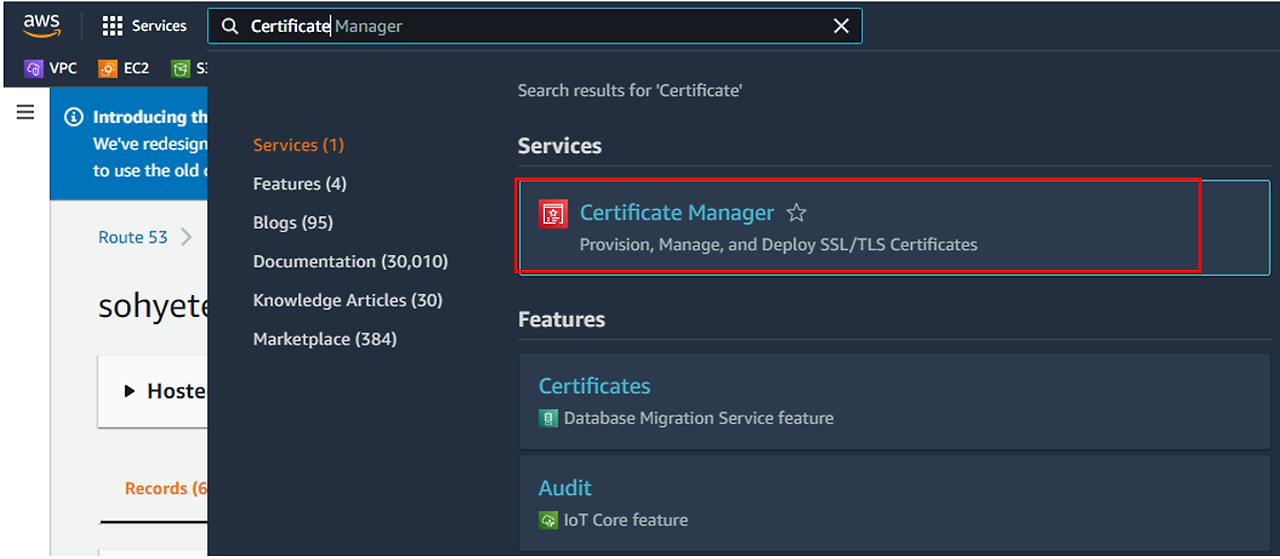
2-1. Go to AWS Certificate Manager service.
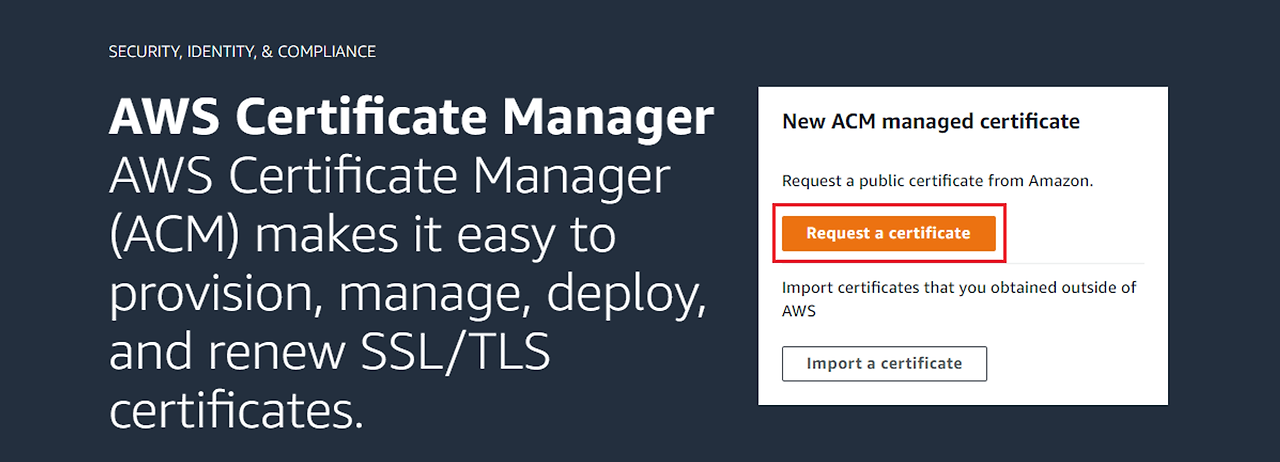
- 2-2. After selecting the Request certificate menu, click the Next button.
Click the ≡ icon at the top left if the left menu is folded
2-3. Enter the full emarket service domain address to use in the future, including their respective domains created in Route 53. Finally, click the Request button.
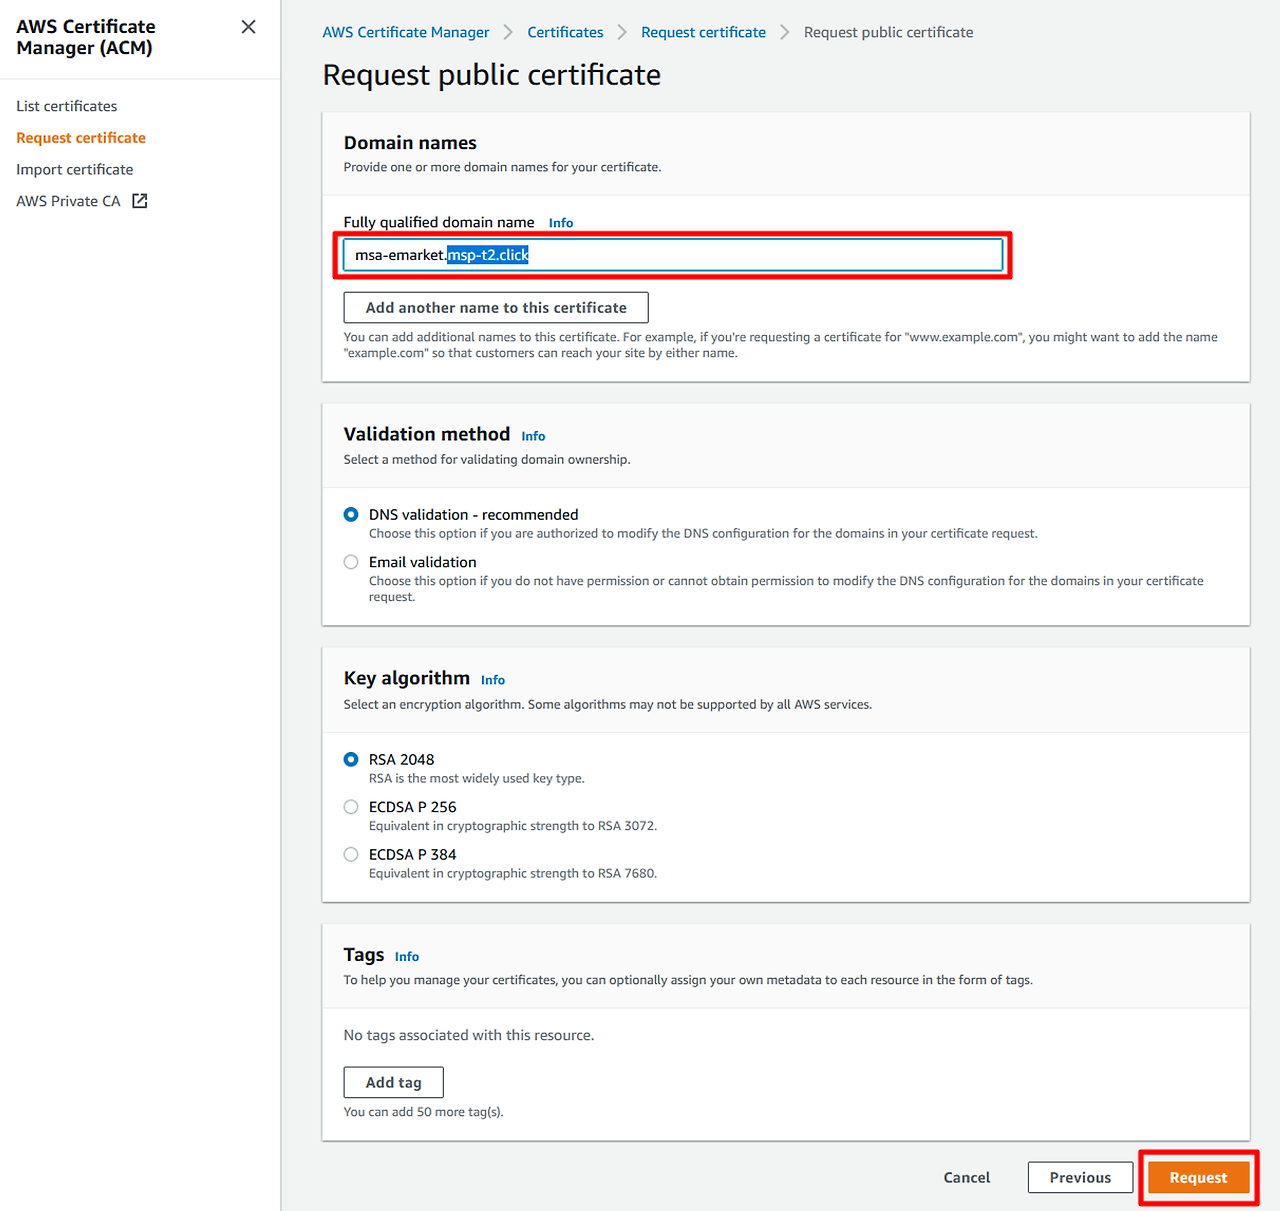
항목내용➕ Fully qualified domain namemsa-emarket.<<YOUR_DOMAIN>> 입력
참고. 도메인 등록 화면 입력값 이 msp-t2 인 경우 📌 <<YOUR_DOMAIN>>은 msp-t2.click 을 메모
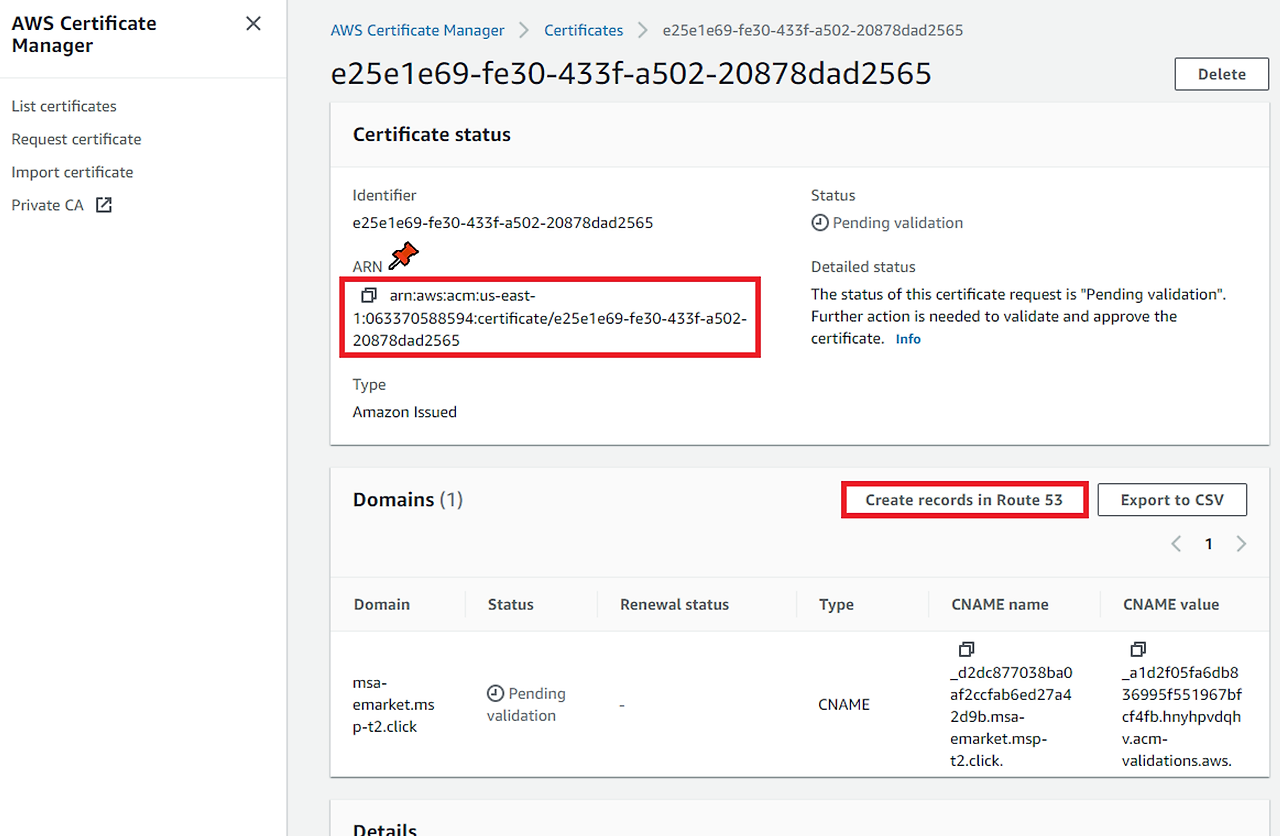
2-4. Go to the List certificates menu on the left and check the list of generated certificates. Then click the generated Certificate ID value.
Certificate ID values created by each are different.

2-5. Check the ARN value of the generated certificate and click the Create records in Route53 button at the bottom.
This is a process of adding the generated certificate information to the CNAME record of Route 53.
The ARN value of the certificate will be used in the future application deployment (day 4), and note it as 📌sslcert_arn item.
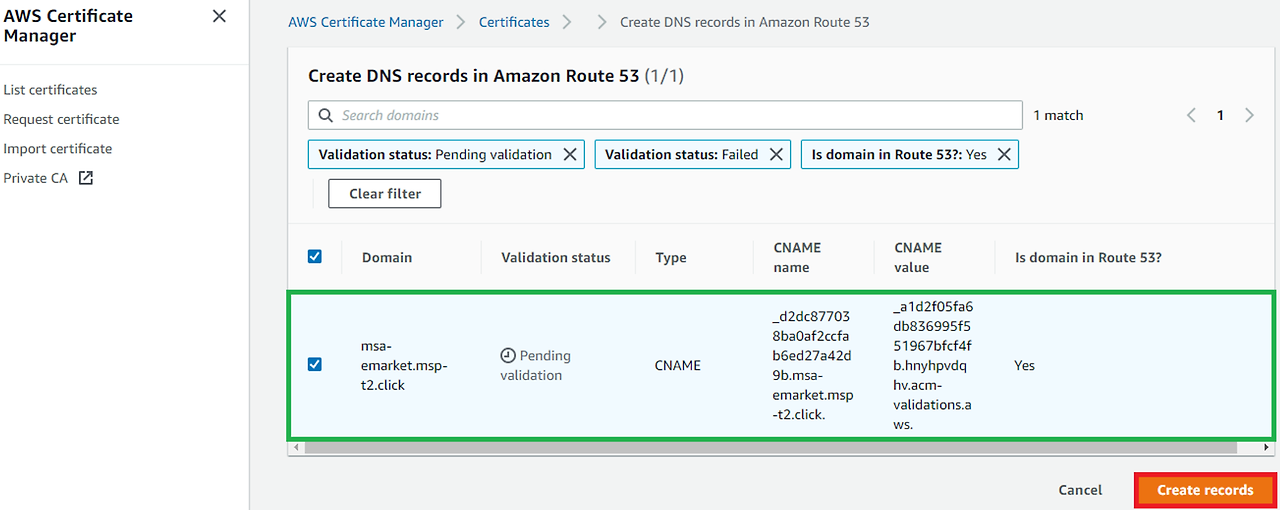
2-6. Make sure your domain created in Route 53 is correct and click the Create records button.
This is the process of linking the generated certificate to the domain of Route53.
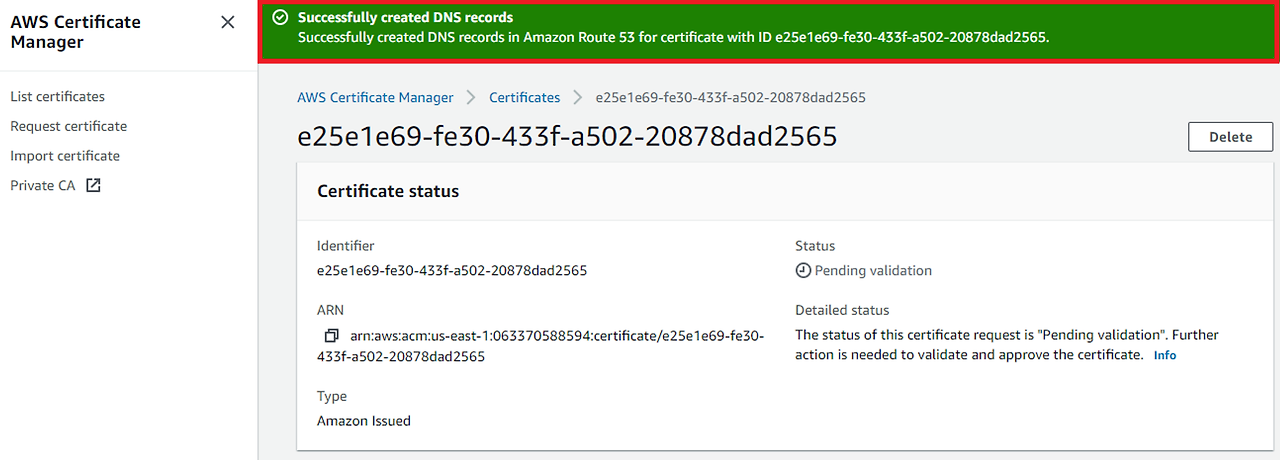
2-7. Confirm that the certificate information is normally added to your domain through the green label/sentence (Successfully created DNS records) at the top.
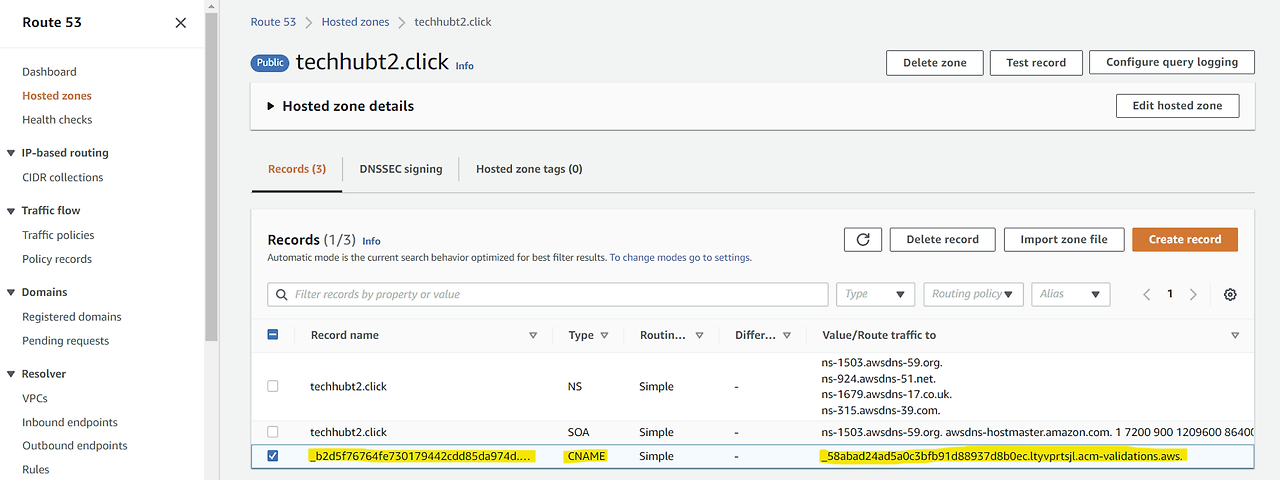
(Note) If you check your domain in the Route53 > Hosted zones menu, you can also see that one CNAME type record has been added.
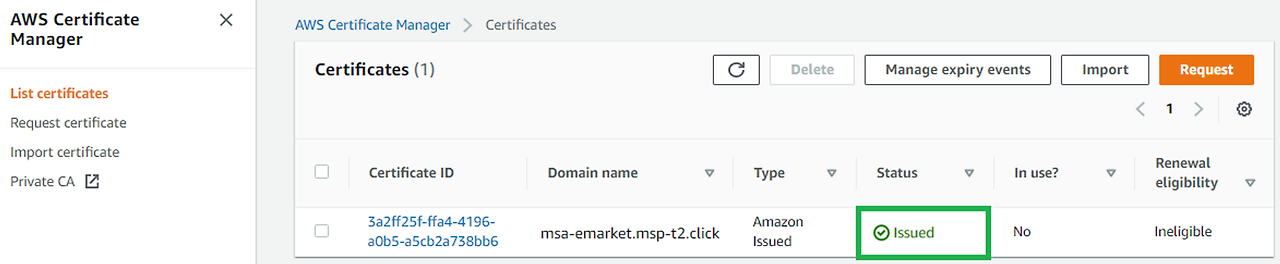
2-8. Go to the List certificates menu on the left and check whether the status value of the generated certificate is in the Issued state.
It may take about 5 minutes from Pending validation to Issued.
On the list screen, click the ↪ Refresh button to see if the status changes.
😃 Work completed!!!
Use Route 53 services to issue individual domains.
The root domain selects .click to reduce the issuance cost.
Issue a certificate with the AWS Certificate Manager service to connect with the registered domain.
'AWS Cloud' 카테고리의 다른 글
| [AWS] Implement Kubernetis Cluster in AWS Cloud (67) | 2024.02.29 |
|---|---|
| [클라우드] AWS Simple Storage S3 사용하기 (128) | 2023.08.03 |
| [Cloud] Creating Amazon VPC and RDS (25) | 2023.07.29 |
| [Cloud] Using Amazon Load Balancer NLB (77) | 2023.07.16 |
| [Cloud] Using CodeCommit. (42) | 2023.07.15 |